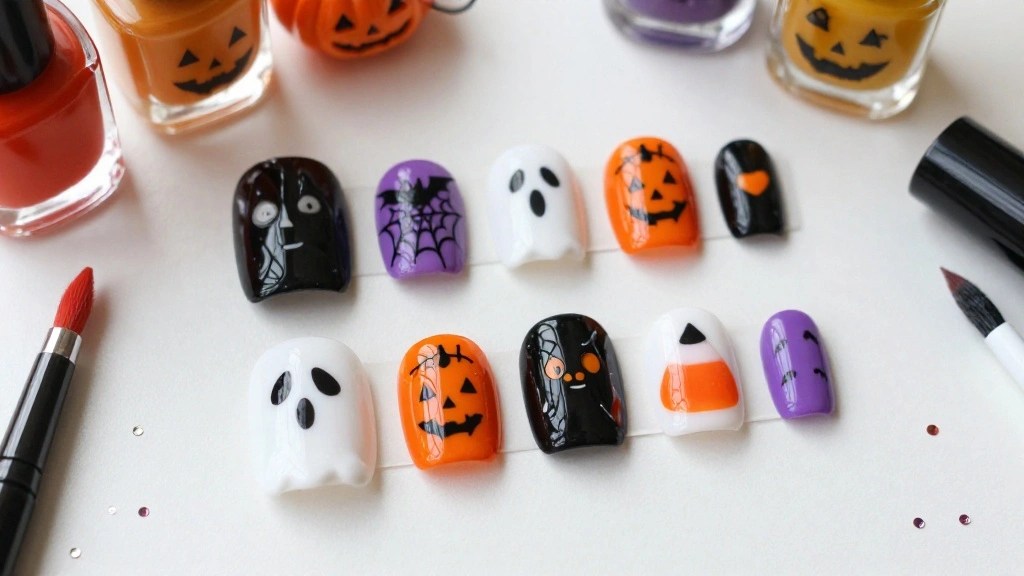
Halloween is the perfect time to give your manicure a playful twist, but you do not need long nails or expert skills to create a fun look. If you want simple Halloween nails that feel cute, spooky, and easy to wear, this guide has you covered. You can use a soft nude base, dark polish, tiny stickers, or a fine nail brush to create designs that match your style.
These Halloween nail ideas work well for short nails, busy schedules, and beginners who want neat results without spending hours at the salon. You will find friendly ghost nails, tiny black cats, pumpkins, spiderwebs, bats, candy corn colors, and ghost face nails. Each look uses small details, clear color choices, and simple shapes that you can adjust to fit your nail length.
Start with clean, dry nails and apply a thin base coat. Let each polish layer dry before adding the next detail. A dotting tool can make ghost eyes and pumpkin spots, while a thin brush can create webs, drips, and tiny moons. If freehand art feels tricky, use nail stickers or decals over a glossy coat. The ideas ahead will help you choose the right look, gather your supplies, and create spooky nails that still feel polished and wearable.
Short nails can handle these designs with ease. Keep large shapes near the center of each nail, use one or two accent nails for busy artwork, and finish with a top coat to protect your work. Try a milky white base for soft ghost nails, a smoky gray blend for floating bats, or warm orange and yellow for a mini pumpkin patch. You can also mix cute and creepy details so your manicure feels festive without looking too dark.
Key Takeaways
-
- Choose a thin base coat and let it dry before adding art. This helps polish stay smooth and keeps dark colors from staining your nails.
-
- Use a milky base for friendly ghost nails, a black polish for cats and bats, and orange, yellow, or cream shades for pumpkins and candy corn.
-
- Keep short Halloween nails neat by placing large details on one or two accent nails. Tiny dots, moons, eyes, and webs work well across the rest.
-
- Try a fine brush, dotting tool, toothpick, or nail stickers when you want easy Halloween nails without perfect freehand skills.
- Seal every design with a glossy top coat. It adds shine, softens rough edges, and helps your Halloween nail art last through parties and busy days.
Contents
- 1. Friendly Ghost Nails on a Milky Base
- 2. Tiny Black Cats and Crescent Moons
- 3. Mini Pumpkin Patch Accent Nails
- 4. Delicate Spiderweb Corner Details
- 5. Ghost Face French Tips
- 6. Candy Corn Color-Block Nails
- 7. Floating Bats Over a Smoky Gradient
- 8. Soft Bloody Drip Tips with a Glossy Finish
- 9. Mix-and-Match Short Halloween Nails
- 10. Easy Sticker and Decal Halloween Nails
1. Friendly Ghost Nails on a Milky Base
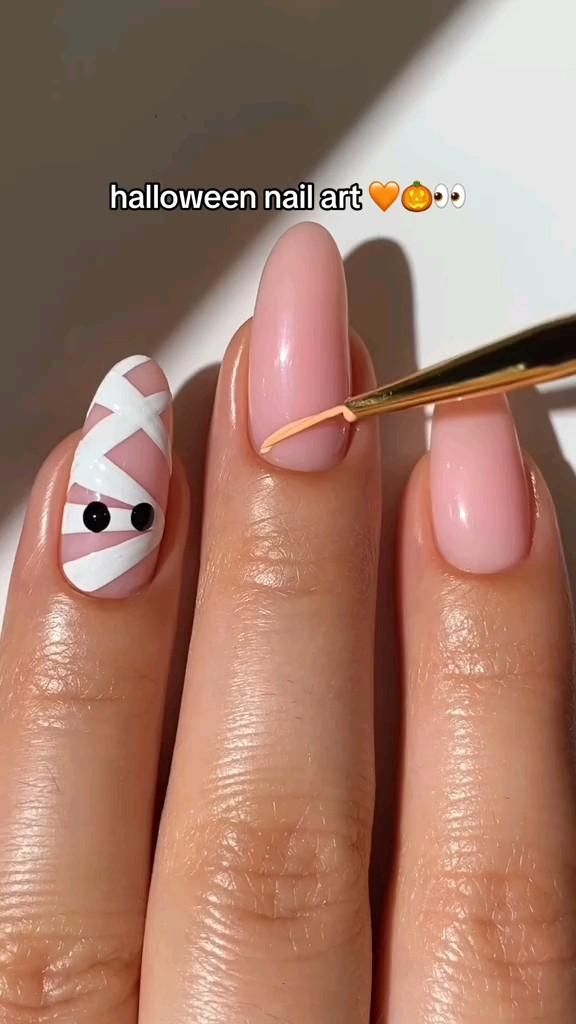
Want Halloween nails that feel sweet instead of scary? Friendly ghost nails add a playful seasonal touch while a milky base keeps your hands soft and polished. This design suits short nails because each ghost needs only a small rounded body, two eyes, and a tiny mouth.
What you need: Choose sheer nude, milky white, pale pink, or soft lavender polish. You will also need white and black polish, a fine detail brush, a dotting tool, base coat, and glossy top coat.
Try this:
1. Shape your nails into a soft round or squoval style, then apply base coat.
2. Add two thin layers of your pale polish and let them dry until firm.
3. Paint a small white ghost near each tip, giving the bottom three gentle waves.
4. Add two black eyes and a tiny oval mouth with a dotting tool.
5. Seal the design with top coat after waiting a few minutes.
Keep the ghosts small so short nails do not look crowded. Place one on the ring finger and add tiny white dots or lavender stars elsewhere for balance. If a shape looks uneven, turn it into a charming, hand-painted detail rather than starting over. A dark purple face can soften the contrast, while a matte top coat creates a cozy finish.
Image credit: OujiArt – Digital Planners & Digital Templates on Pinterest
2. Tiny Black Cats and Crescent Moons
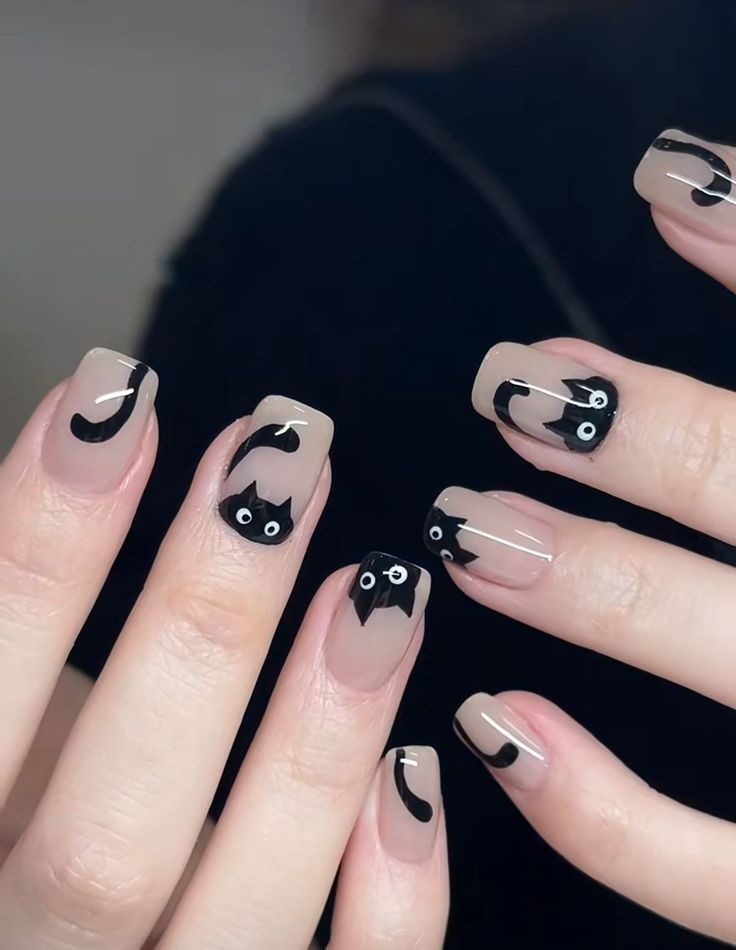
Tiny black cats make Halloween nails feel playful and storybook-inspired. Their simple silhouettes look striking against cream, muted orange, pale pink, or dusty purple polish. You do not need to paint whiskers or fur. A round head, pointed ears, small body, and curved tail create a clear cat shape in just a few strokes.
What you need: Gather a cream or beige base, black polish, a fine liner brush, a dotting tool, optional gold polish, base coat, and top coat. Deep plum also works when you want a darker night-sky background.
Paint the design:
1. Apply base coat and two thin layers of your chosen background color.
2. Use the dotting tool to place one black dot for the head and a smaller one for the body.
3. Pull two pointed ears from the head with a fine brush.
4. Add a curved tail beside the body, leaving a little space between them.
5. Paint a tiny crescent moon or three gold stars nearby.
6. Finish with top coat once the silhouette feels dry.
For short nails, use only the cat head and ears. A matte background with glossy black cats adds texture without extra details. If the ears look uneven, make them small triangles and add a moon to balance the nail. Let black polish dry for several minutes before applying top coat, then float the brush gently across the surface.
Image credit: Laurie Forbes on Pinterest
Product Recommendations:
• women fine liner nail art brush set
• women nail dotting tool and detail brush kit
• women matte glossy nail art top coat
• women halloween nail polish colors regular polish
3. Mini Pumpkin Patch Accent Nails
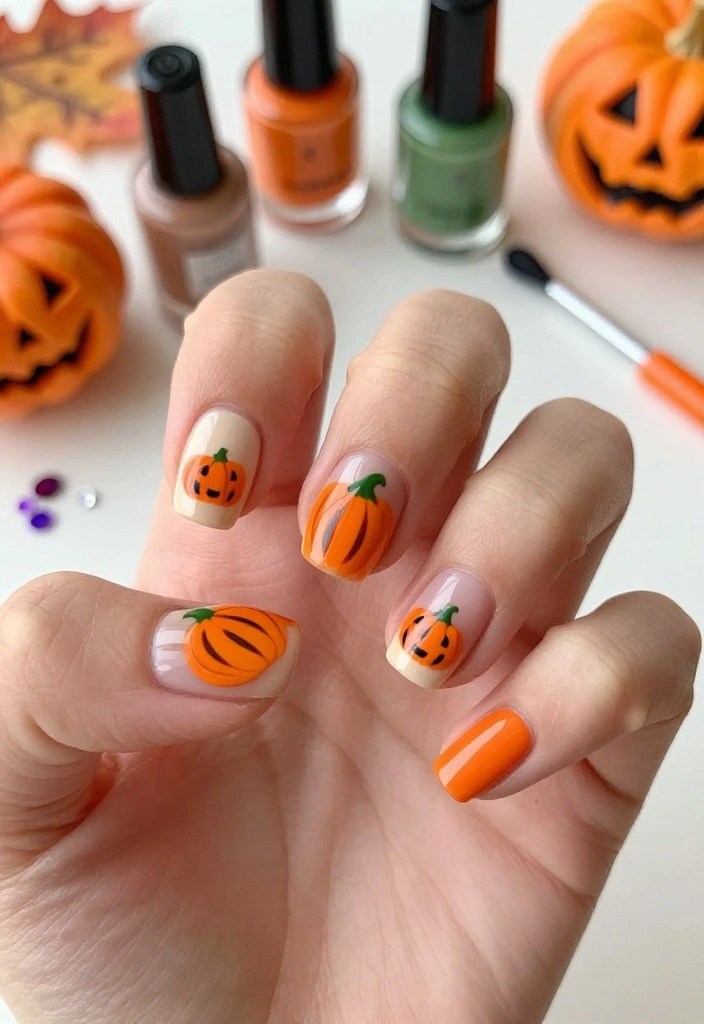
Pumpkin nails bring warm autumn color to your manicure without making it feel too loud. Tiny orange pumpkins look especially cute on cream, nude, or soft peach polish, and they work on both short and long nails. Use one or two pumpkin accents instead of covering every nail, so the final look stays fresh and easy to wear.
What you need: Pick cream or nude polish, pumpkin orange, mossy green, optional brown, a detail brush, a dotting tool, base coat, and top coat. Muted terracotta creates a softer finish than bright orange.
Create the pumpkins:
1. Apply base coat and two thin layers of your pale polish.
2. Add one orange dot or small rounded oval near the tip.
3. Use a darker orange shade to paint two or three curved sections.
4. Add a tiny brown or green stem at the top.
5. Paint one small leaf if the nail has enough space.
6. Seal the artwork once the polish feels dry.
Place pumpkins on the thumb and ring finger, then use orange French tips or tiny dots on the other nails. Short nails look best with narrow pumpkins set slightly below the free edge. If the orange shape looks too round, add darker side lines to define it. Seal the nail tips carefully because they face constant rubbing from phones, bags, and keyboards.
Product Recommendations:
• women fall nail polish set nude orange green brown
• women nail art dotting tool set
• women Halloween nail polish set orange nude green
4. Delicate Spiderweb Corner Details
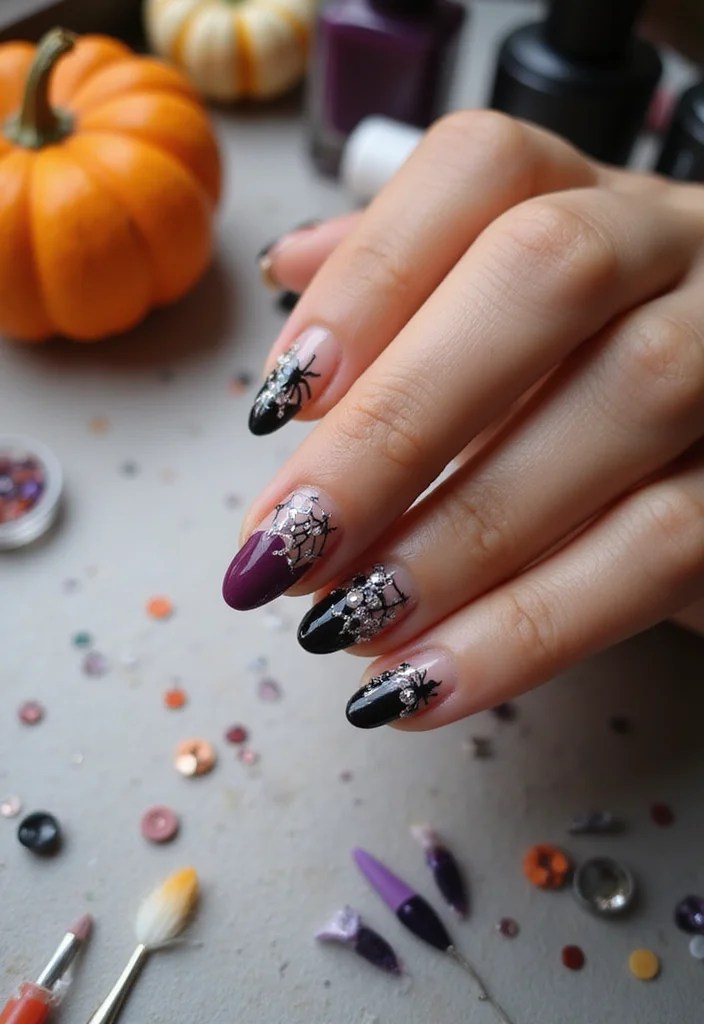
A tiny spiderweb in the corner gives your manicure a spooky touch without covering the whole nail. Open space keeps the design clean, while thin black, white, or silver lines create just enough drama. This idea is perfect when you want simple Halloween nail art that looks polished at work, school, or a party.
Choose your colors: Try a sheer nude base with black lines, deep plum with white lines, or glossy black with silver. You will also need base coat, a fine liner brush, striping polish, and your choice of matte or glossy top coat.
Paint the web:
1. Apply base coat and two even layers of your background color.
2. Let the surface dry until it feels smooth and firm.
3. Draw three or four thin lines from one corner toward the center.
4. Connect them with small curved lines, starting near the corner.
5. Add a tiny spider, dot, or rhinestone if you want extra detail.
6. Finish with top coat after the web has dried.
Use very light pressure because pressing hard makes striping lines thick. Practice a few curves on foil first. On short nails, keep the web within one quarter of the nail. If one line becomes too heavy, let it dry, cover it with base color, and try again. A gentle floating stroke of top coat will help prevent smearing.
❝ A tiny spiderweb in the corner is all you need for polished Halloween nail art. Pair a sheer nude base with fine black lines for spooky nails that stay office-ready, party-perfect, and beautifully simple.
5. Ghost Face French Tips
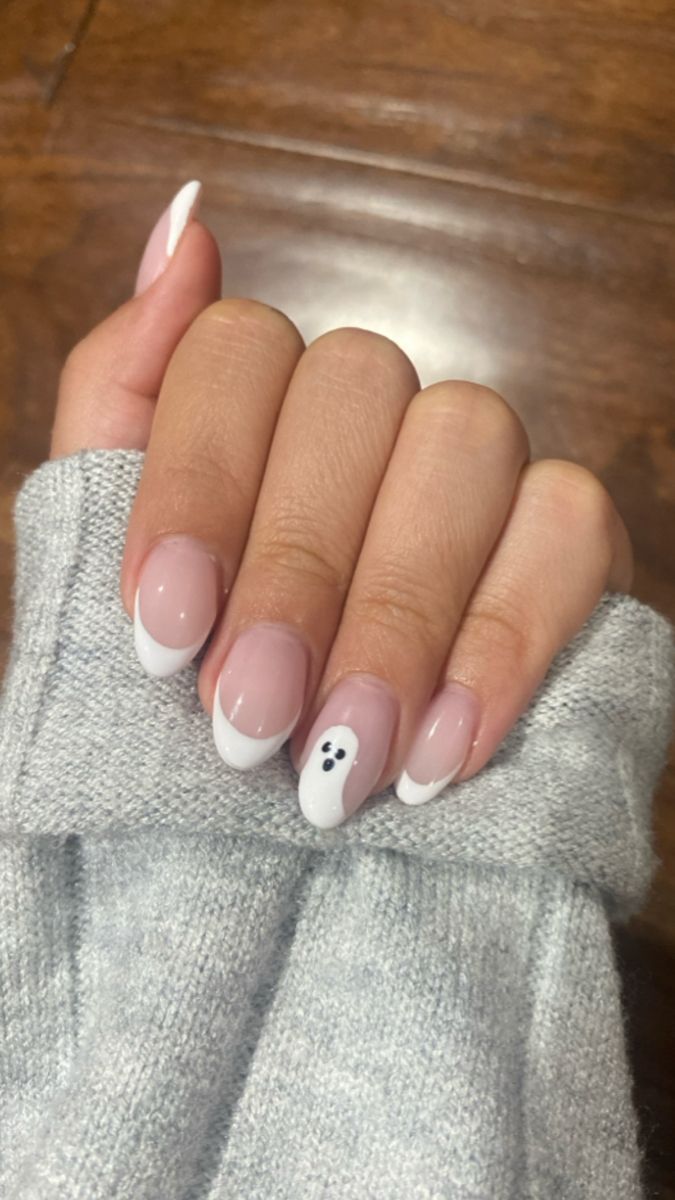
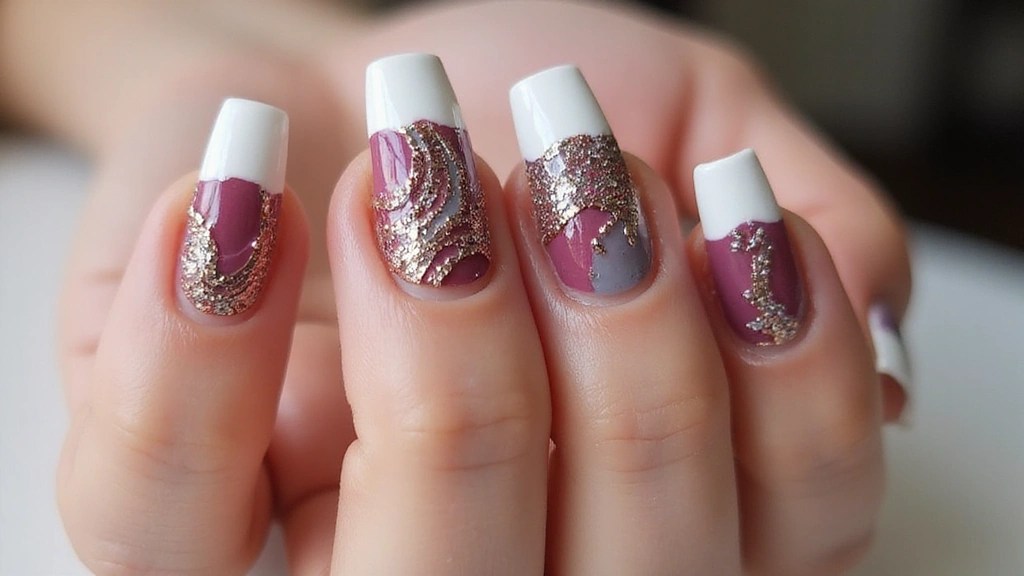
Give a classic French manicure a cute Halloween update with tiny ghost faces at the tips. The sheer base keeps the nails neat and lengthening, while the white tips add a soft spooky detail. This style works well when you want seasonal nail art that still matches sweaters, jeans, and everyday outfits.
What you need: Use sheer pink, nude, or pale gray polish with white and black polish. Add a fine nail-art brush, dotting tool, base coat, and glossy top coat. French-tip guides can help if painting curved edges feels difficult.
Make the ghost tips:
1. Apply base coat and two thin layers of sheer polish.
2. Paint a narrow white French tip on each nail.
3. Make the lower edge gently wavy instead of perfectly straight.
4. Add two black eyes near the middle of each tip.
5. Add a tiny oval, dot, or surprised mouth below the eyes.
6. Clean the sidewalls and apply top coat after the faces dry.
Keep the white section narrow on short nails. If there is not enough room for a mouth, use only two eyes. You can make every expression different for extra charm. A matte nude base with glossy ghost tips adds a subtle contrast, while one lavender star on the ring finger brings a small pop of color without distracting from the simple black-and-white design.
Image credit: Adge✨😜🤍 on Pinterest
You might also like
16 Creepy and Trendy Halloween Nail Art Ideas You Need to Try This Year!
15 Chic French Nail Art Inspirations That Will Make Heads Turn!
6. Candy Corn Color-Block Nails
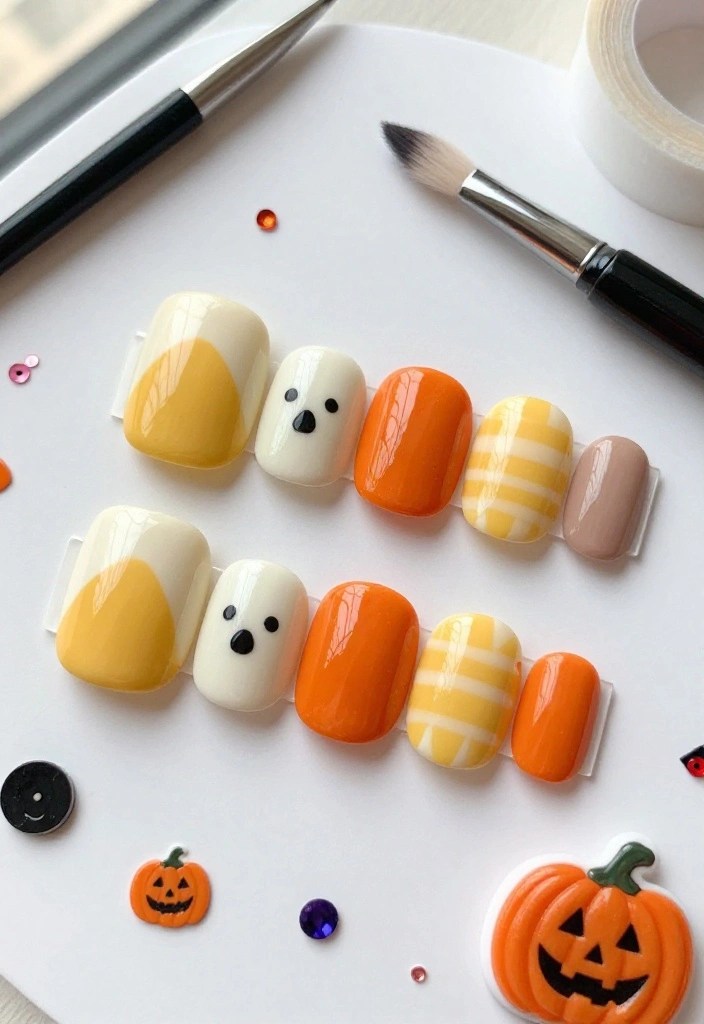
Candy corn nails bring instant October color through creamy white, golden yellow, and pumpkin orange. The manicure feels festive without using ghosts or scary details, making it a cheerful choice for everyday wear. Crisp bands look neat and graphic, while a sponge creates a softer finish when you want an easier technique.
What you need: Gather cream, yellow, orange, and nude polish, plus base coat and top coat. Thin striping tape and tweezers help create sharp edges. Use muted shades for a more grown-up look or brighter colors for a playful manicure.
For clean color blocks:
1. Apply base coat and one thin nude layer.
2. Let it dry fully before placing striping tape across the nail.
3. Paint the tip orange, then lift the tape carefully.
4. Add another tape line above the orange section.
5. Paint yellow in the middle and leave the cuticle area cream.
6. Seal the design once all bands are dry.
Place orange at the free edge, yellow in the center, and cream near the cuticle. On short nails, keep each band narrow so the nail does not look shorter. For a softer option, paint the three colors onto a makeup sponge and press them onto the nail in short taps. One candy-corn accent nail paired with solid cream or orange nails is also easy to wear.
❝ Want festive Halloween nail art without spooky details? Paint creamy white, golden yellow, and pumpkin-orange bands—or blend them with a sponge for an easy candy-corn finish that feels cheerful, wearable, and perfectly polished all October.
Related Video: 5 EASY Candy Corn Nail Designs for HALLOWEEN | Halloween Nail Art Tutorial
7. Floating Bats Over a Smoky Gradient
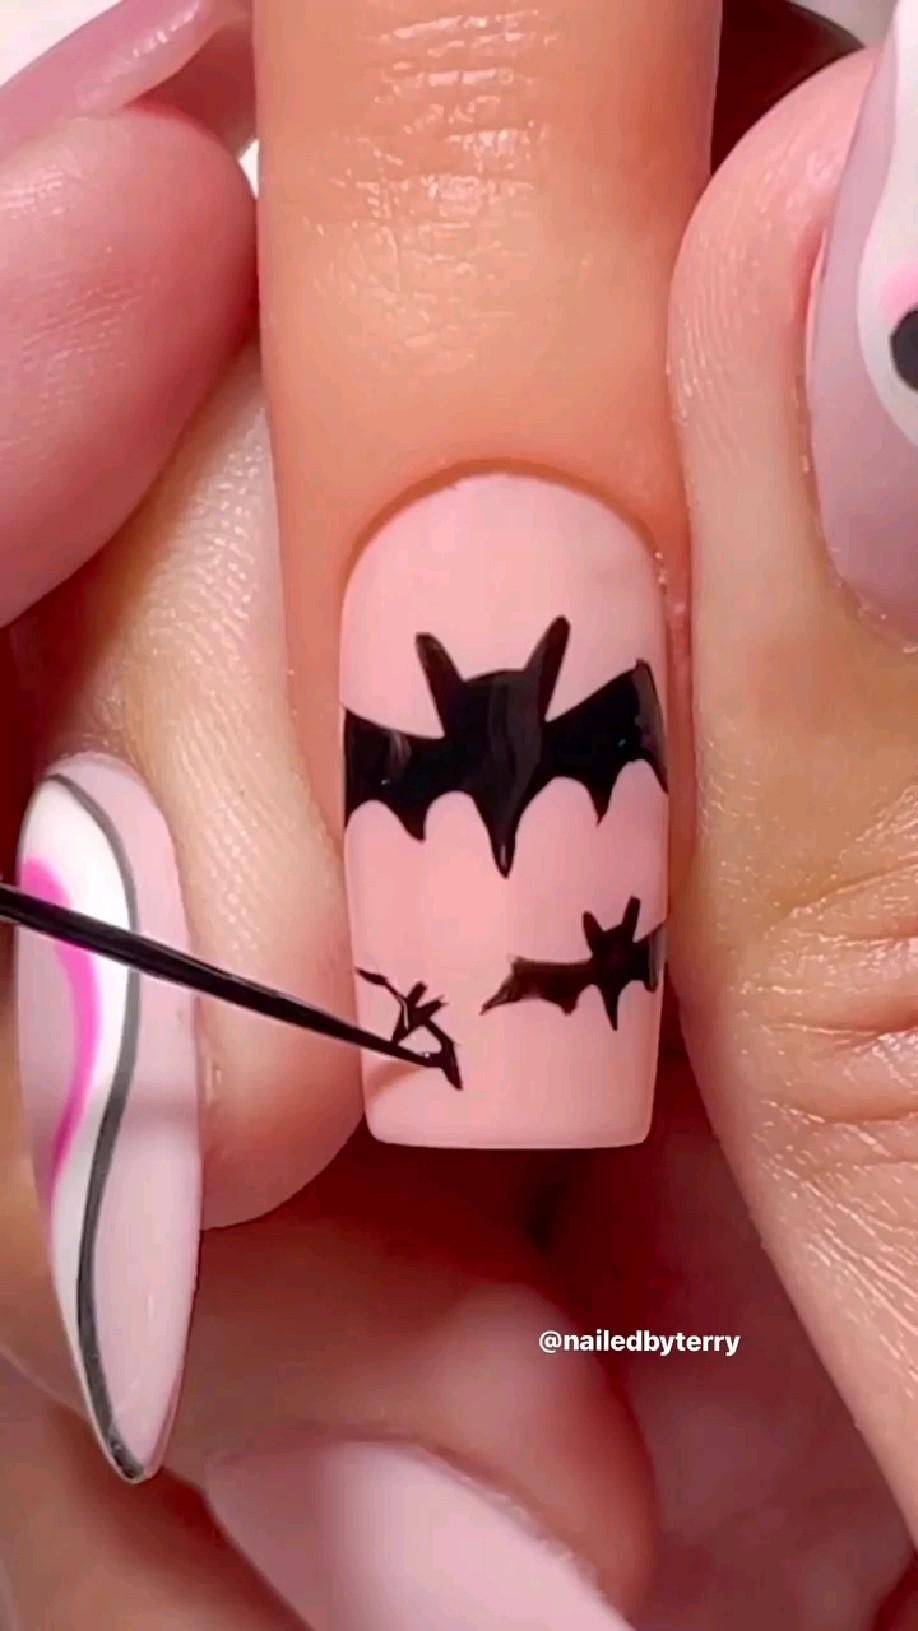
Small bat silhouettes look dramatic against a smoky gradient, but they are easier to paint than they appear. Blend nude into purple, orange into black, or gray into plum for a cloudy night-sky effect. The result feels spooky without becoming too heavy, making it a strong choice for short Halloween nails.
What you need: Prepare pale nude, purple, and black polish, a makeup sponge, fine liner brush, dotting tool, base coat, and top coat. Deep red can replace purple for a warmer autumn palette. Bat decals work well if you prefer not to paint freehand.
Build the look:
1. Apply base coat and one pale layer.
2. Paint two gradient colors onto a makeup sponge with a slight overlap.
3. Press the sponge onto the nail in short taps until the blend looks smooth.
4. Clean the skin before the gradient dries.
5. Paint a tiny bat body and add two pointed wings with shallow curves.
6. Add a few distant dots before sealing the design.
Keep bats at different heights so the manicure feels like a moving night sky. A single small bat works best on short nails. Start with a tiny body and build the wings slowly. If the shape looks like a blob, add small stars around it or reduce the size on the next nail. Glossy top coat deepens the colors, while matte top coat creates a soft, hazy finish.
Image credit: Shelly B Nuance on Pinterest
Product Recommendations:
• women Halloween nail polish set nude purple black orange
8. Soft Bloody Drip Tips with a Glossy Finish
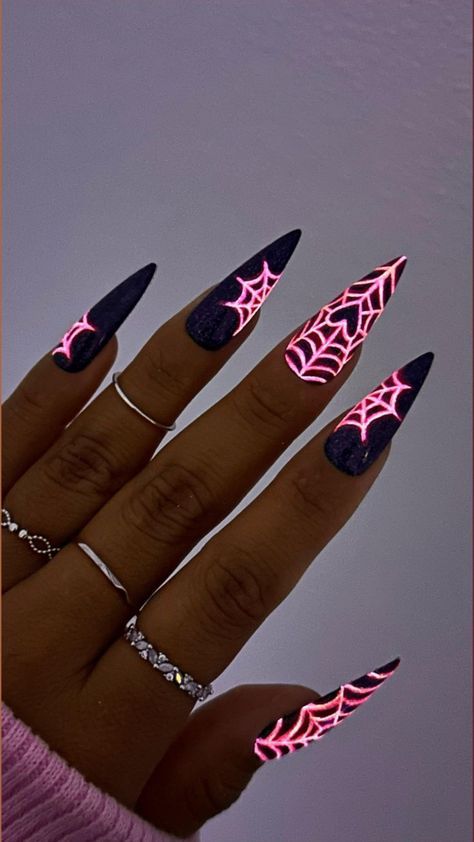
Red drip tips give Halloween nails a darker edge while staying simple enough for beginners. Choose cherry red over sheer nude for a playful look, or use burgundy over blush polish for something moodier. The glossy finish makes the color look rich, and uneven drips can still appear intentional.
What you need: Use sheer nude or soft pink polish, deep red polish, a dotting tool, fine detail brush, base coat, and glossy top coat. Black polish is optional if you want a thin outline around a few drips.
Create the tips:
1. Apply base coat and two thin layers of nude or pink polish.
2. Place red dots of different sizes along the free edge.
3. Pull each dot upward with a fine brush to form rounded drips.
4. Fill the tip area with red and smooth the upper edge.
5. Leave small spaces between the longest drips.
6. Wait for the red to dry before adding glossy top coat.
Starting with dots keeps the drips rounded and controlled. If the red spreads, let the base dry longer or switch to a thicker formula. Use only one drip accent nail for a softer style, or pair red tips with ghost faces and one black accent nail. Seal the free edge and avoid hot water for the first hour so the layers can set properly.
Image credit: gdjd on Pinterest
Product Recommendations:
• women red bloody drip nail polish kit
• women nail art dotting tool set
You Might Also Like
10 Whimsical Nail Designs That Will Make You Smile Every Time You Look at Your Hands!
From Boardroom to Happy Hour: 3 Minimalist Nail Art Looks You Can DIY
9. Mix-and-Match Short Halloween Nails
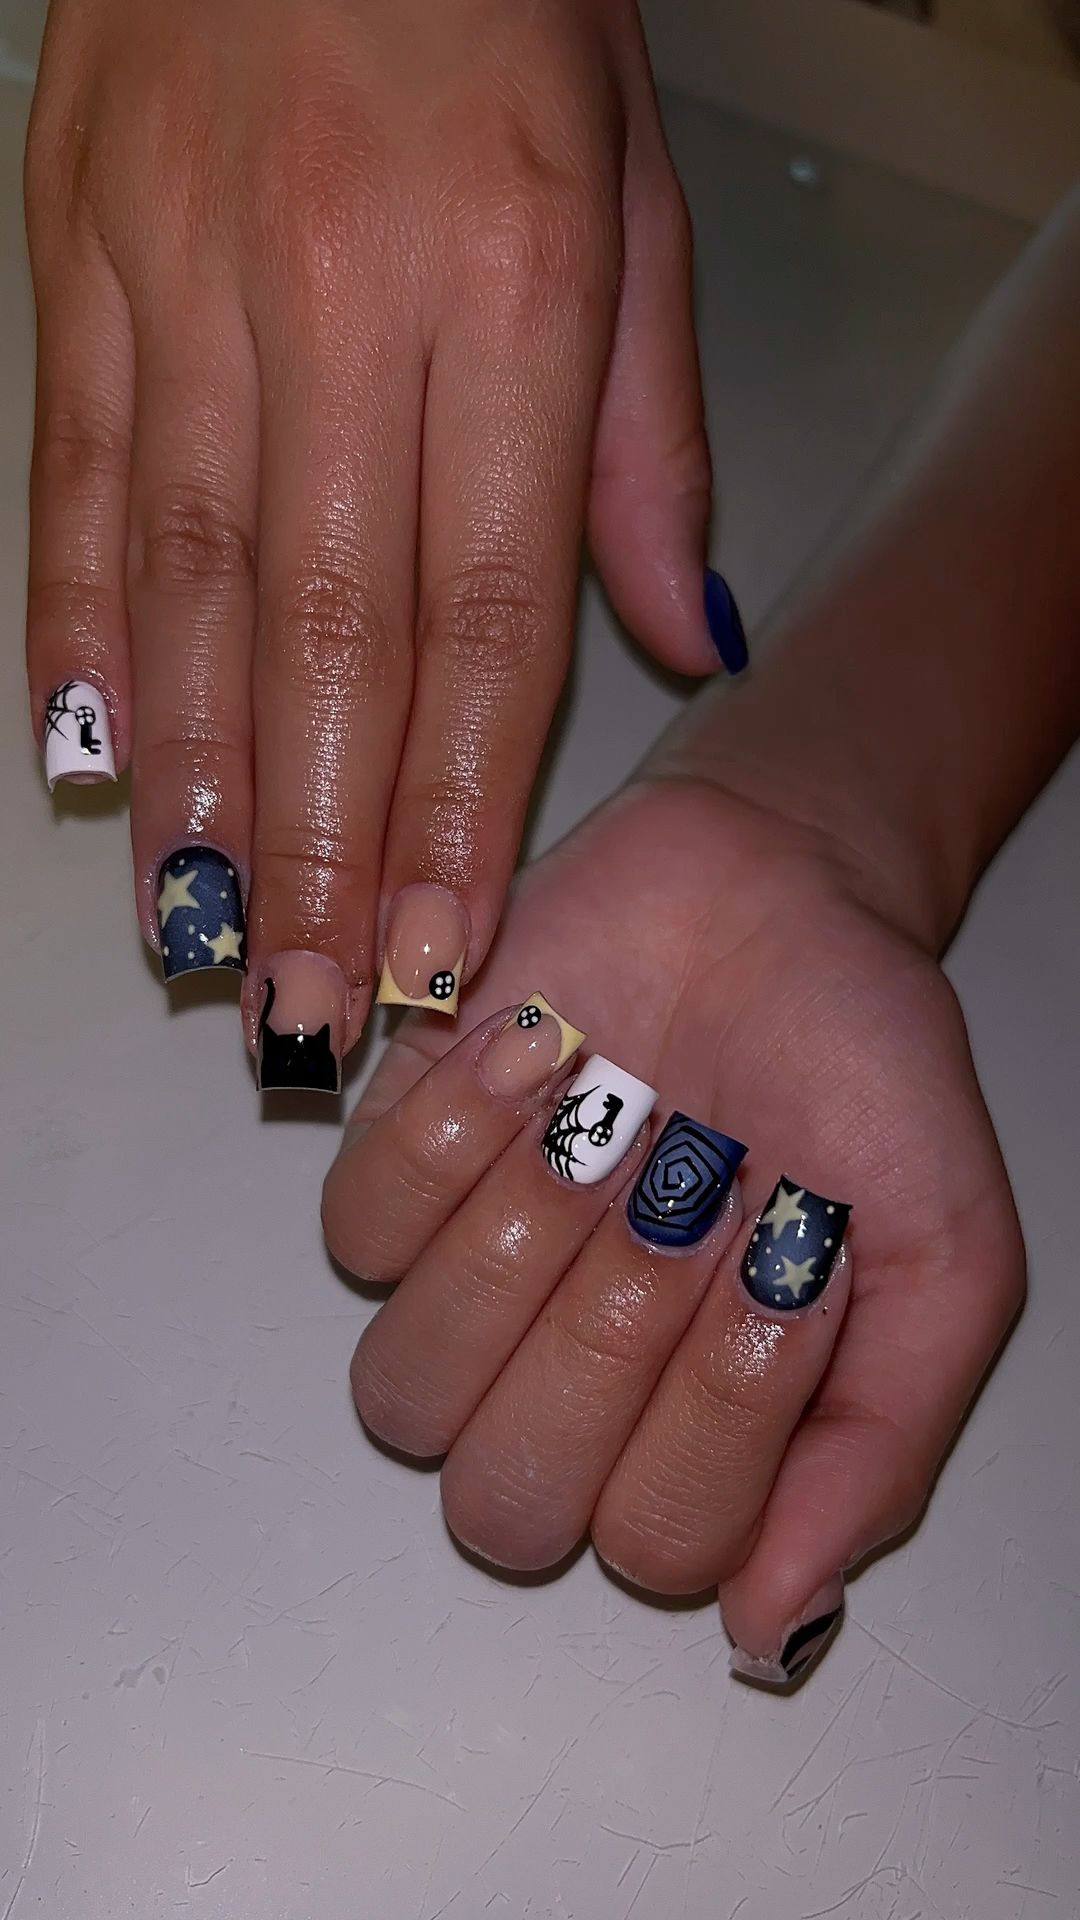
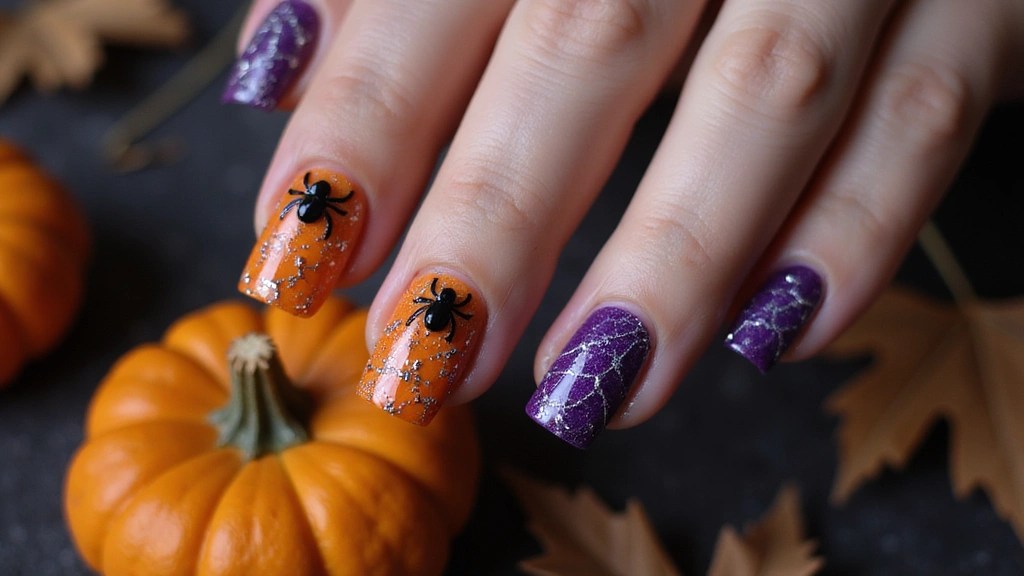
Cannot choose between ghosts, pumpkins, bats, and webs? Combine them in one manicure. Mix-and-match Halloween nails look thoughtful when you repeat the same colors across every design. Short nails are ideal because each nail can hold one small motif without forcing too many details into one space.
Build a simple palette: Try black, cream, orange, and purple for a classic look. For softer Halloween nails, choose nude, white, lavender, and charcoal. Keep the busiest design on the ring or middle finger, then use simple dots, French tips, or solid colors on the remaining nails.
Try this layout:
1. Paint the thumb glossy black with one tiny orange dot.
2. Add a small black bat over a cream index nail.
3. Place a white ghost on a sheer nude middle nail.
4. Use an orange French tip or pumpkin on the ring finger.
5. Finish with a purple corner web on the little finger.
Let each nail dry before starting the next one. Repeat one detail, such as silver stars or black outlines, to connect the different designs. If freehand painting feels hard, use decals for the ghost or bat and paint only the dots and tips. When one nail goes wrong, turn it into a solid accent. That flexibility makes this style friendly for home manicures.
❝ Mix-and-match short Halloween nails make indecision look intentional: give each nail one motif, then repeat black, cream, orange, or purple throughout. This simple Halloween nail art trick keeps ghosts, pumpkins, bats, and webs coordinated without overcrowding tiny nails.
Image credit: Valeria Yanez on Pinterest
How To Use Halloween Nail Art
Want cute spooky nails without a salon visit? You can create simple Halloween nail art at home with a few polish colors, a fine brush, and a steady hand. Short nails work well for tiny ghosts, black cats, spiderweb corners, and ghost face French tips because small details look neat on a shorter nail.
Tools You’ll Need:
• Base coat and glossy top coat
• White, black, orange, red, nude, and gray nail polish
• Fine nail art brush or toothpick
• Dotting tool, bobby pin, or the rounded end of a pin
• Nail file and cuticle stick
• Makeup sponge for a smoky gradient
• Halloween stickers or decals for an easy option
Step 1: Prep Your Nails
Clean nails help your Halloween nail art stay neat for longer. Shape each nail with a file, then gently push back the cuticles. Keep all nails the same length, or use one accent nail for a larger ghost or pumpkin design.
✔ Remove old polish and wash away oil.
✔ File in one direction to reduce rough edges.
✔ Add one thin layer of base coat and let it dry.
Step 2: Pick a Simple Color Plan
Choose two to four colors before you start. A milky white base with black ghosts gives a soft look, while orange and black create a classic spooky style. Red drip tips look bold over nude polish, and gray or purple can create a smoky background for floating bats.
✔ Use white and black for ghost nails or ghost face nails.
✔ Use orange, yellow, and white for candy corn color blocks.
✔ Use nude, red, and glossy clear polish for bloody drip tips.
Step 3: Paint the Base in Thin Layers
Apply two thin coats instead of one thick coat. Thin layers dry faster and help small designs sit flat. Let each coat dry for two to three minutes, or follow the timing on your polish bottle.
✔ Paint a milky base for friendly ghost nails.
✔ Add a soft gray gradient with a makeup sponge for bats.
✔ Leave one or two nails plain for stickers, pumpkins, or spiderweb details.
Step 4: Add the Halloween Details
Use the smallest brush or dotting tool you have. For ghost nails, make a small white oval, then add two black eyes and a tiny mouth. For black cats, place two dots for the head and add small pointed ears with a fine brush. Draw spiderwebs from one corner with three thin lines, then connect them with curved lines.
✔ Make pumpkin accents with orange dots and a green stem.
✔ Paint ghost face French tips by placing eyes and a small mouth near the white tip.
✔ Add tiny black bats with one small body and two curved wings.
✔ Use decals when you want a clean design without freehand painting.
Step 5: Seal and Clean the Look
Wait until the art feels dry before adding top coat. Brush from the cuticle to the tip in one smooth stroke so the design does not smear. Add a second thin layer to the nail tip if you wash your hands often.
✔ Clean polish from the skin with a small brush dipped in remover.
✔ Check each nail under bright light for missing lines or smudges.
✔ Add cuticle oil after the top coat dries fully.
For easy Halloween nails, start with one design on each hand and repeat the same colors. Mix-and-match short Halloween nails also look cute when every nail shares one detail, such as black dots, tiny stars, or a glossy finish. If you use gel polish, cure every layer under the lamp for the time listed on the bottle, and keep uncured gel off your skin.
⏱ Time: About 30 to 60 minutes, depending on the details. 💡 Tip: Practice ghosts and spiderwebs on paper first, then work on your nails with light strokes.
10. Easy Sticker and Decal Halloween Nails
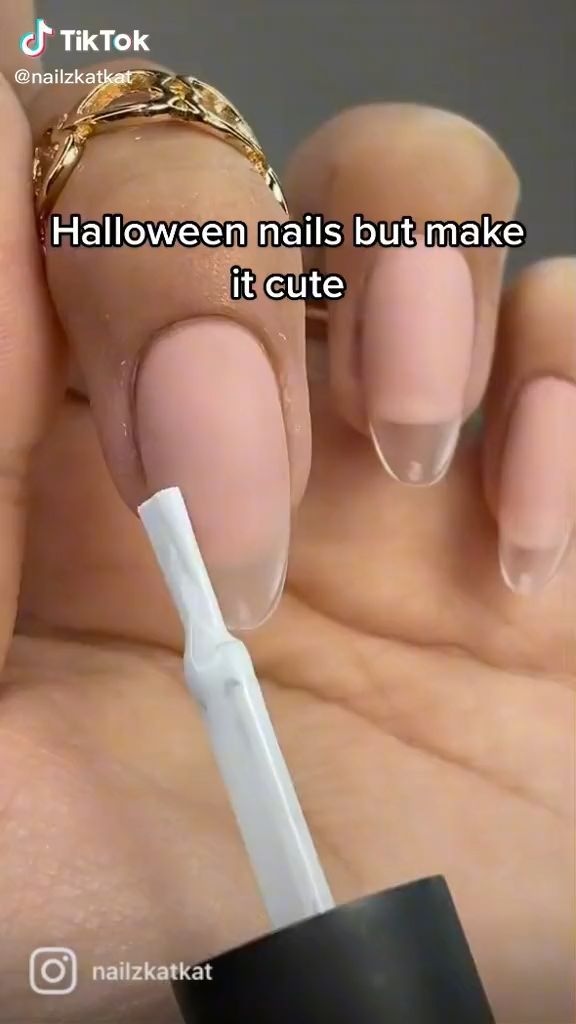
Halloween stickers and decals let you create detailed nail art without needing a steady painting hand. Ghosts, bats, pumpkins, cats, and webs can look crisp over a smooth base, especially when you mix one large design with simple solid nails. Careful placement matters more than artistic skill, so this is a smart option for quick plans or first-time nail art.
What you need: Gather decals or stickers, sheer nude or cream polish, tweezers, a silicone tool, base coat, and flexible glossy top coat. Water-transfer decals also need a small dish of water. Choose a matte top coat if you want a softer finish.
Apply the decals:
1. Shape the nails and gently push back the cuticles.
2. Apply base coat and one or two thin polish layers.
3. Let the polish dry completely before adding decals.
4. Trim around each design, leaving only a small border.
5. Place the decal away from the cuticle and sidewalls.
6. Press from the center outward to remove air pockets.
7. Trim any edge that reaches past the nail tip.
8. Seal with one thin top-coat layer, then add another after it dries.
Black bats look sharp over pale polish, while white ghosts stand out on black or purple. Keep large decals on the ring finger so short nails do not look crowded. If a corner lifts, smooth it down and reseal it instead of pulling the sticker off. Add a tiny glitter dot or hand-painted moon beside the decal for a custom finish.
Image credit: Beauty in Line | Mindset | Selfcare | Skincare | Body care on Pinterest
Product Recommendations:
• women’s nail art tweezers and silicone tool kit
• women’s manicure tweezers for nail stickers
• women’s nail base coat and glossy top coat set
Conclusion: Pick a Spooky Detail and Make It Yours
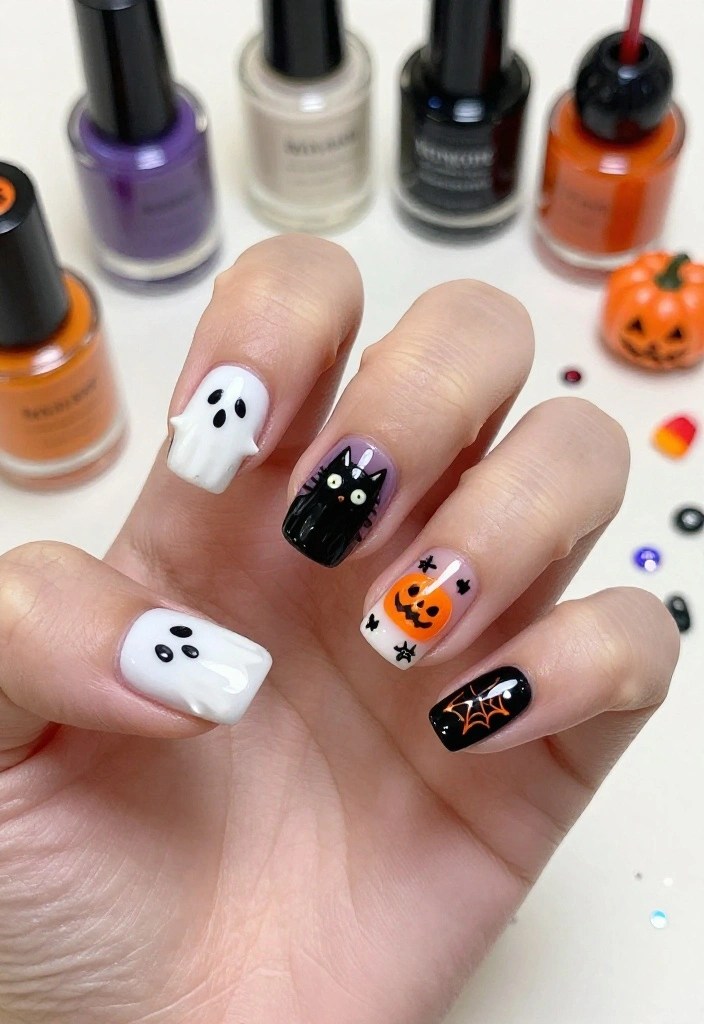
The best Halloween nail art is the design you will actually enjoy wearing. Start with a simple base, choose one favorite detail, and build from there with ghosts, bats, pumpkins, webs, or a tiny pop of orange. Short nails can look just as festive as longer nails, especially when the artwork is neat, the colors work together, and the finish is well sealed.
Save your favorite idea, gather a few basic tools, and let the manicure have a little personality. Whether you choose cute ghost nails, glossy spooky nails, or an easy decal set, a small seasonal detail is enough to make the whole look feel ready for October.
Note: We aim to provide accurate product links, but some may occasionally expire or become unavailable. If this happens, please search directly on Amazon for the product or a suitable alternative.
This post contains Amazon affiliate links, meaning we may earn a small commission if you purchase through our links, at no extra cost to you.
Frequently Asked Questions
What Are Some Easy Halloween Nail Art Ideas for Beginners?
Start with simple designs that create a big impact, such as tiny pumpkins, spider webs, candy corn stripes, black French tips, or minimalist ghost nails.
Use a dotting tool, fine nail-art brush, or toothpick to add small details without needing advanced skills. A black, white, orange, and purple polish palette makes it easy to create classic spooky nails at home.
For the quickest look, paint your nails a solid shade and add one accent nail featuring a ghost, moon, or cute bat.
How Can I Create Halloween Nails on Short Nails?
Short nails are perfect for clean, simple Halloween nail designs because small details look adorable without feeling overwhelming.
Try tiny ghost faces, mini spider webs, black French tips, orange-and-black dots, or single pumpkin accents. Keep the artwork concentrated near the tip or center of the nail so the design remains sharp and easy to see.
A sheer nude base with a few spooky details is also a great choice for elegant Halloween nail inspo that works for everyday wear.
How Do I Make Cute Ghost Nails at Home?
To make cute ghost nails, begin with a dark base such as black, navy, or deep purple. Once it is completely dry, use white polish to paint small, rounded ghost shapes on one or two nails.
Add tiny black eyes and an open mouth with a dotting tool or the tip of a toothpick. For a playful finish, give each ghost a slightly different expression or add miniature stars around them.
Seal your ghost nails with a glossy top coat to smooth the artwork and help prevent chips.
What Nail Polish Colors and Tools Are Best for Halloween Nail Art?
A versatile Halloween nail art collection includes black, white, orange, red, purple, green, and nude polish. These shades can create everything from dramatic spooky nails to soft, cute Halloween nails.
For tools, keep a fine detail brush, dotting tool, makeup sponge, clean-up brush, and high-quality base and top coats nearby. A toothpick can work in a pinch for tiny eyes, spider legs, and web lines.
Choose highly pigmented polish so your designs stand out, especially when painting over a dark base.
How Can I Make My Halloween Nail Designs Last Longer?
Long-lasting Halloween nails start with clean, dry nail plates. Gently push back your cuticles, lightly buff away shine, and apply a thin base coat before adding color.
Use thin layers of polish and allow each layer to dry or cure fully before adding nail art. Finish with a generous top coat, making sure to seal the free edge of each nail.
To protect your spooky nails, wear gloves while cleaning, avoid using your nails as tools, and refresh the top coat after a few days. If you use gel polish, follow the lamp and removal instructions carefully to avoid nail damage.
Related Topics
halloween nail art
spooky nails
ghost nails
ghost face nails
cute halloween nails
short nail designs
easy nail art
minimalist nails
beginner friendly
seasonal nail art
halloween nail inspo


Leave a comment