
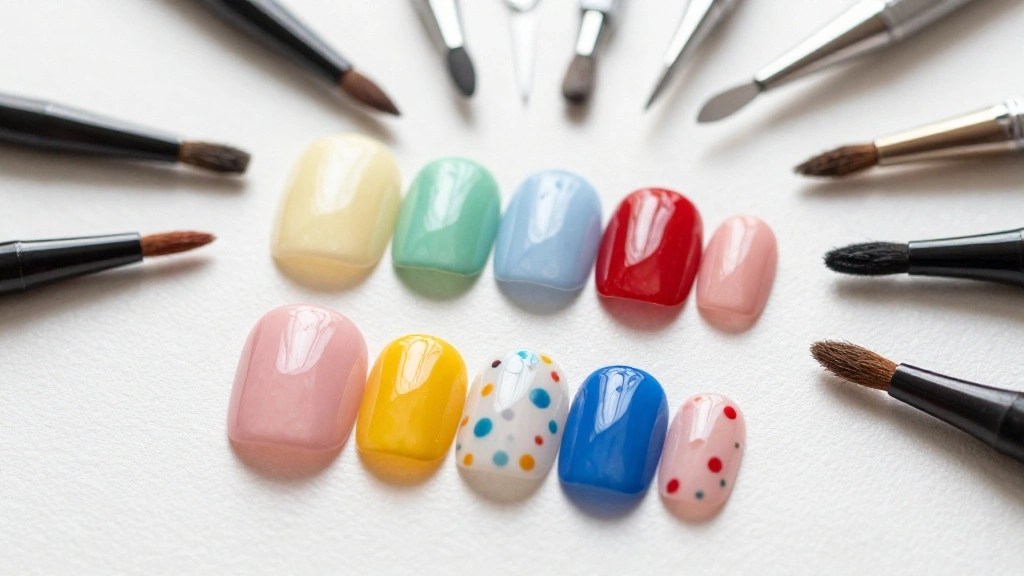
Nail art has been a creative outlet for many, and this season it’s all about the jelly nails. These colorful, translucent designs have taken the beauty world by storm, making them an absolute must-try. The soft, squishy look of jelly nails gives a playful vibe to any outfit, and I couldn’t resist sharing some of my favorites. If you’re someone who loves to stand out and express your style through your nails, you’ll find inspiration in these stunning designs.
This post is for all the nail art enthusiasts out there who are eager to try something fresh and fun. Whether you’re planning for a special event or just want to add a pop of color to your everyday look, you’ll find something to spark your creativity. I’ve gathered ten amazing jelly nails designs that are vibrant, trendy, and perfect for the current season. You’ll discover ideas that cater to various tastes, helping you make the most of your nail art journey.
Get ready to explore exciting designs like Fruity Delight and Starry Night. Each one is unique and easy to replicate, so you can bring these looks to life at home or share them with your nail technician. Let’s dive into this colorful world of jelly nails and unlock your next favorite nail trend!
Key Takeaways
– Jelly nails are a trendy way to add a pop of color and playfulness to your look this season.
– The designs range from fruity and floral to geometric and minimalist, offering something for everyone.
– You can try these stunning looks at home with the right tools and techniques, making nail art accessible.
– Experimenting with different styles allows you to express your personality while keeping up with the latest nail trends.
– Each design showcases the versatility of jelly nails, ensuring you have fun while creating beautiful art on your fingertips.
Contents
- 1. Fruity Delight
- 2. Ombré Dreams
- 3. Starry Night
- 4. Tie-Dye Fun
- 5. Geometric Chic
- 6. Floral Fantasy
- 7. Neon Glow
- 8. Minimalist Vibes
- 9. Animal Instincts
- 10. Sparkling Sensation
1. Fruity Delight
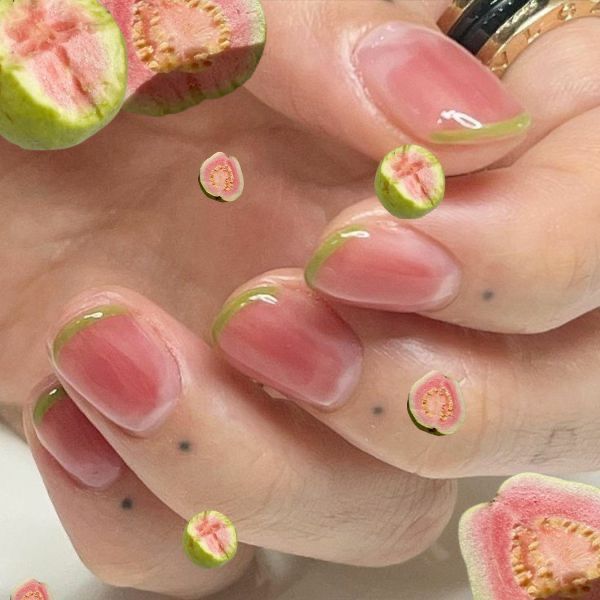
Bright and cheerful, this design is all about the vibrant colors of your favorite fruits. Picture juicy oranges, refreshing limes, and delicious berries, all coming together in a fun jelly finish. It’s the perfect look for summer gatherings, beach days, or picnics with friends.
To create this playful style, select a lively base color that captures the essence of a fruit you adore. Use a dotting tool to add playful polka dots in contrasting jelly hues, layering them for that fruity effect. Complete the look with a glossy topcoat to amplify the jelly shine.
Outfit Pieces:
– Bright orange jelly polish
– Zesty lime jelly polish
– Luscious berry jelly polish
– Optional: glitter topcoat for extra sparkle
Styling Tips:
– Pair your fruity nails with a casual summer dress for a cohesive look.
– Keep your nails medium-length to showcase the vibrant design without overwhelming your hands.
– Play with color combinations by mixing shades from different fruits for a unique twist.
This fun design is ideal for casual outings and can easily brighten up any summer outfit.
Image credit: ✰ on Pinterest
2. Ombré Dreams
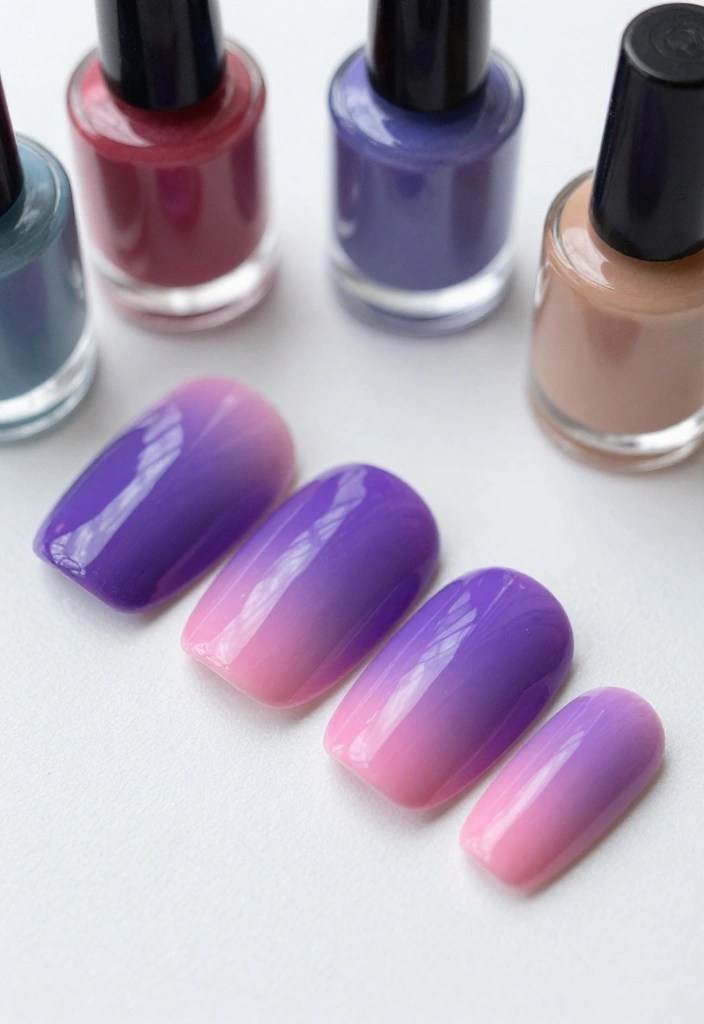
Ombré nails are a timeless favorite, and the jelly texture takes them to a whole new level of beauty! This design seamlessly blends two or more jelly shades, creating a soft gradient that is both stunning and sophisticated. It’s an excellent choice for any occasion where you want to look effortlessly chic.
To master the ombré effect, start with a base coat and use a makeup sponge to dab on different jelly colors, blending them while you work. This technique ensures a smooth transition between colors. Think of soft lavender fading into delicate pink or a lovely ocean blue melting into bright teal.
Outfit Pieces:
– Soft lavender jelly polish
– Delicate pink jelly polish
– Ocean blue jelly polish
– Bright teal jelly polish
Styling Tips:
– Allow each layer to dry completely before applying the next for a polished appearance.
– Finish with a glossy topcoat to enhance the jelly effect and add shine.
– Reverse the ombré for a bold statement if you’re feeling adventurous!
This design is versatile enough to match any outfit or mood, making it a must-try!
Related Video: Easiest Way To Do Ombre Nails WITHOUT an Airbrush OR Sponge Beginner Friendly Gel X Nails Tutorial
3. Starry Night
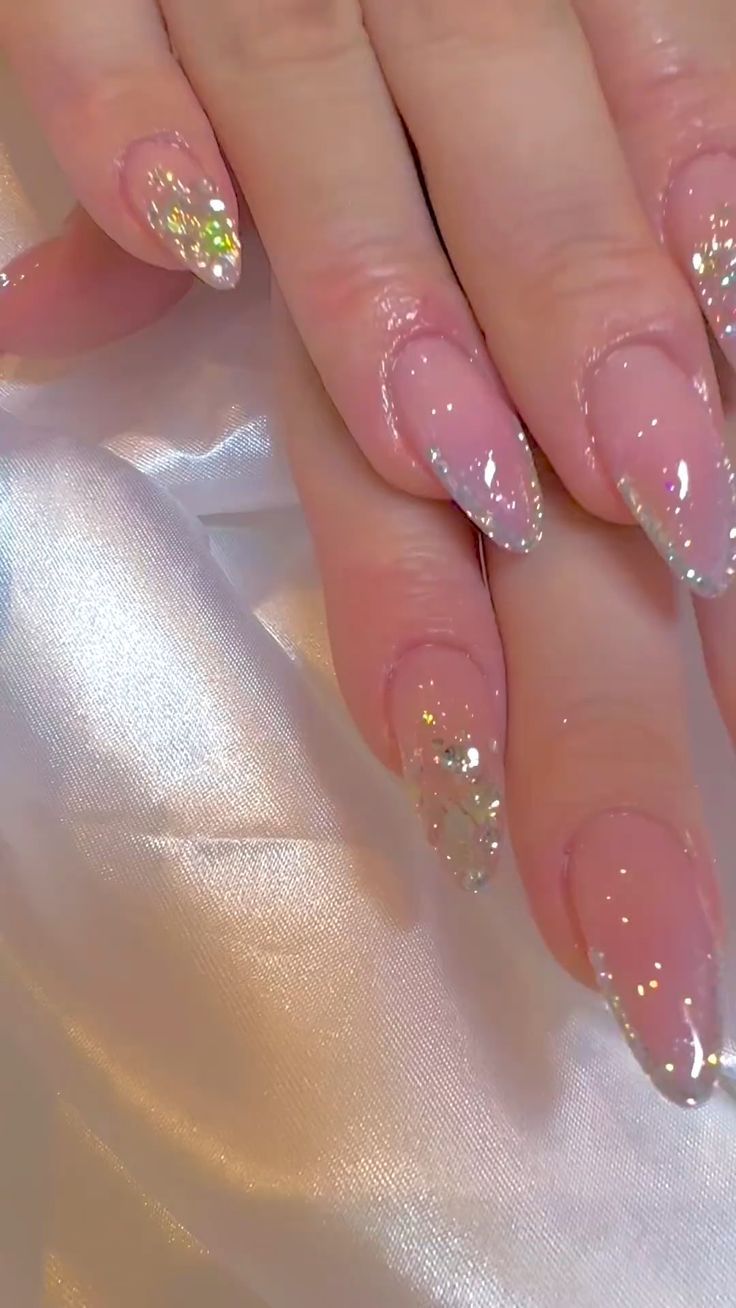
Transform your nails into a celestial masterpiece with this starry jelly design! Featuring deep navy or black jelly bases, tiny white stars scattered across create an enchanting and chic vibe. It’s perfect for evening events or anytime you want to add a touch of glamour to your look.
To achieve this stunning design, start with a dark jelly base. Once dry, use a small dotting tool or a nail brush to meticulously place white dots for stars. For extra sparkle, apply a glitter topcoat that mimics the twinkling sky.
Outfit Pieces:
– Deep navy jelly polish
– Black jelly polish
– White nail polish for stars
– Optional: glitter topcoat
Styling Tips:
– Consider a matte topcoat for the base to enhance texture and uniqueness.
– Get creative with star shapes for a more personalized touch.
– Pair this design with simple outfits to let your nails be the star of the show.
This design is an excellent choice for adding glam to your everyday style or for special occasions!
Starry jelly nails make glam feel effortless. Start with a dark jelly base, dot on white stars, then seal with a glitter topcoat for instant evening sparkle.
Image credit: MK Fashion on Pinterest
How To Choose The Right Jelly Nails Design
Choosing the perfect jelly nails design can be a fun yet overwhelming experience. With so many styles and colors available, it’s important to consider a few key factors that will help you nail your look this season. Let’s break it down.
1. Consider Your Skin Tone
Your skin tone plays a significant role in how colors appear on your nails. If you have warm undertones, colors like peach, coral, and warm pinks will look great on you. For cooler skin tones, opt for shades like lavender, blue, or icy pink. Testing a few jelly colors on your nails can help you see what complements your skin best.
2. Choose a Style that Matches Your Personality
Think about your personal style when selecting a jelly nails design. If you love bold and bright looks, go for neon shades or intricate patterns. If you prefer a subtle approach, minimalist designs with pastel jelly colors might appeal more to you. Your nails should reflect who you are, so choose what makes you feel good!
3. Think About the Occasion
Different occasions call for different nail styles. For formal events, a classic jelly ombré or a simple nude jelly might be appropriate. For fun gatherings, try playful designs like tie-dye or fruity patterns. Knowing where you plan to show off your nails can help narrow down your choices.
4. Nail Length and Shape
The shape and length of your nails can influence which jelly design will look best. Longer nails often offer more space for intricate designs, while shorter nails might suit simpler styles. Consider opting for geometric patterns or solid colors on shorter nails, while longer nails can handle more complex designs like florals or art.
5. Stay Updated with Nail Trends
Keeping an eye on nail trends can inspire your jelly nails selection. Check social media platforms and nail art blogs for the latest styles, colors, and techniques. Trends like jelly sandwiches (layering jelly polish with glitter) and mix-and-match designs can add a fun twist to your nail game.
6. Consider Your Comfort Level
Finally, think about how comfortable you are with certain nail designs. If you’re new to nail art, it might be best to start with simpler jelly designs before moving onto more intricate styles. Don’t hesitate to take your time to find what resonates with you and makes you feel confident.
Pro Tip: Before committing to a design, try using nail wraps or temporary press-on jelly nails. They are a great way to test out styles and colors without a long-term commitment. Plus, they can be easily removed or changed if you’re feeling adventurous!
4. Tie-Dye Fun
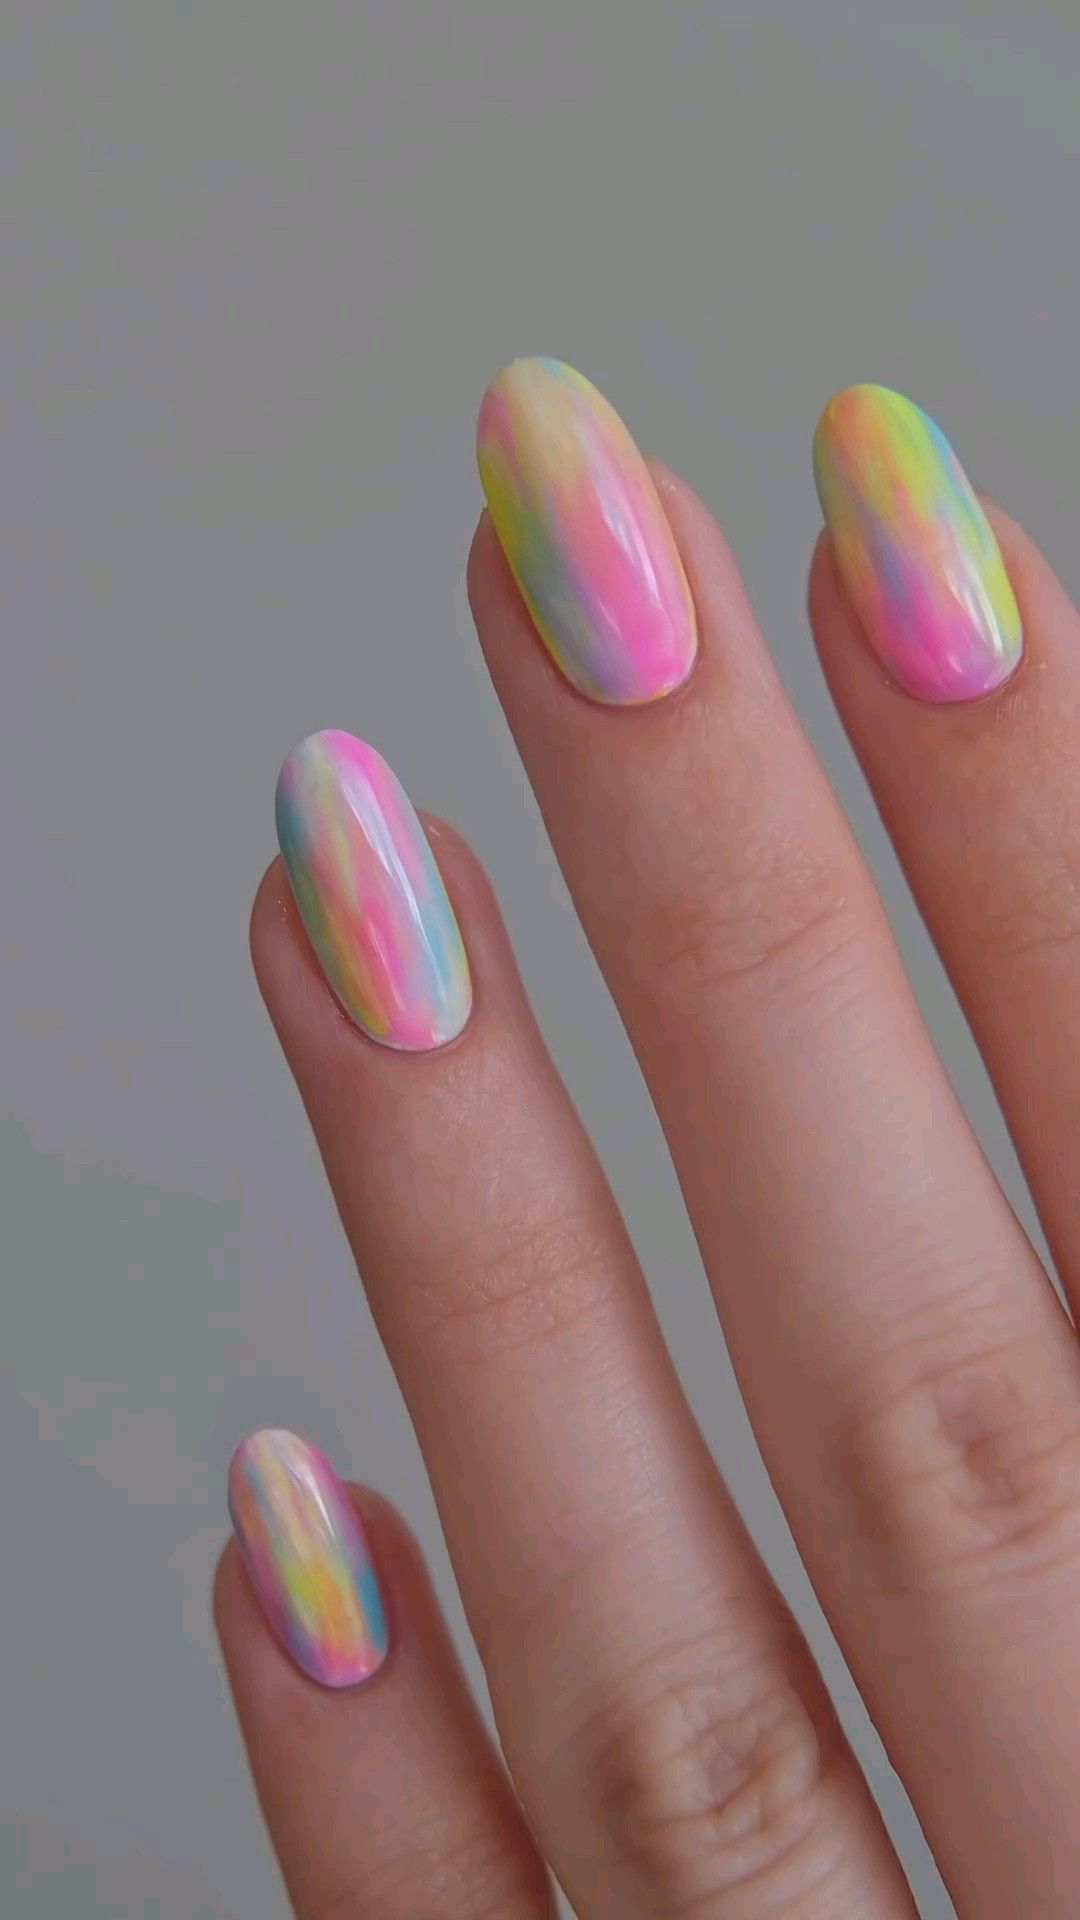
Embrace a vibrant tie-dye jelly nail design that channels a fun, carefree spirit! This playful look is all about blending shades to create a psychedelic masterpiece. Perfect for festivals, beach days, or whenever you want to radiate positivity.
Start with a white or clear jelly base. Use a small brush or dotting tool to create random splotches of various jelly colors. Swirl them together gently, but don’t overmix to keep the colors distinct. Finish with a glossy topcoat to maintain the vibrant hues.
Outfit Pieces:
– White jelly polish for the base
– Bright pink jelly polish
– Electric blue jelly polish
– Sunny yellow jelly polish
– Optional: glossy topcoat
Styling Tips:
– For a dramatic look, use a matte base to contrast with your vibrant colors.
– Neon colors can amplify the fun factor if you want to go bold.
– Don’t worry about precision; the more carefree, the better this design looks!
This lively design is sure to brighten your day and is a fantastic choice for casual outings!
Tie-dye jelly nails are a mood you wear on your fingertips. Start with a clear jelly base, dab on bright colors, and swirl lightly to keep the shades distinct. Finish with a glossy topcoat for a carefree festival-ready finish.
Image credit: osmnailarts on Pinterest
Tie-Dye Fun
Editor’s Choice
5. Geometric Chic
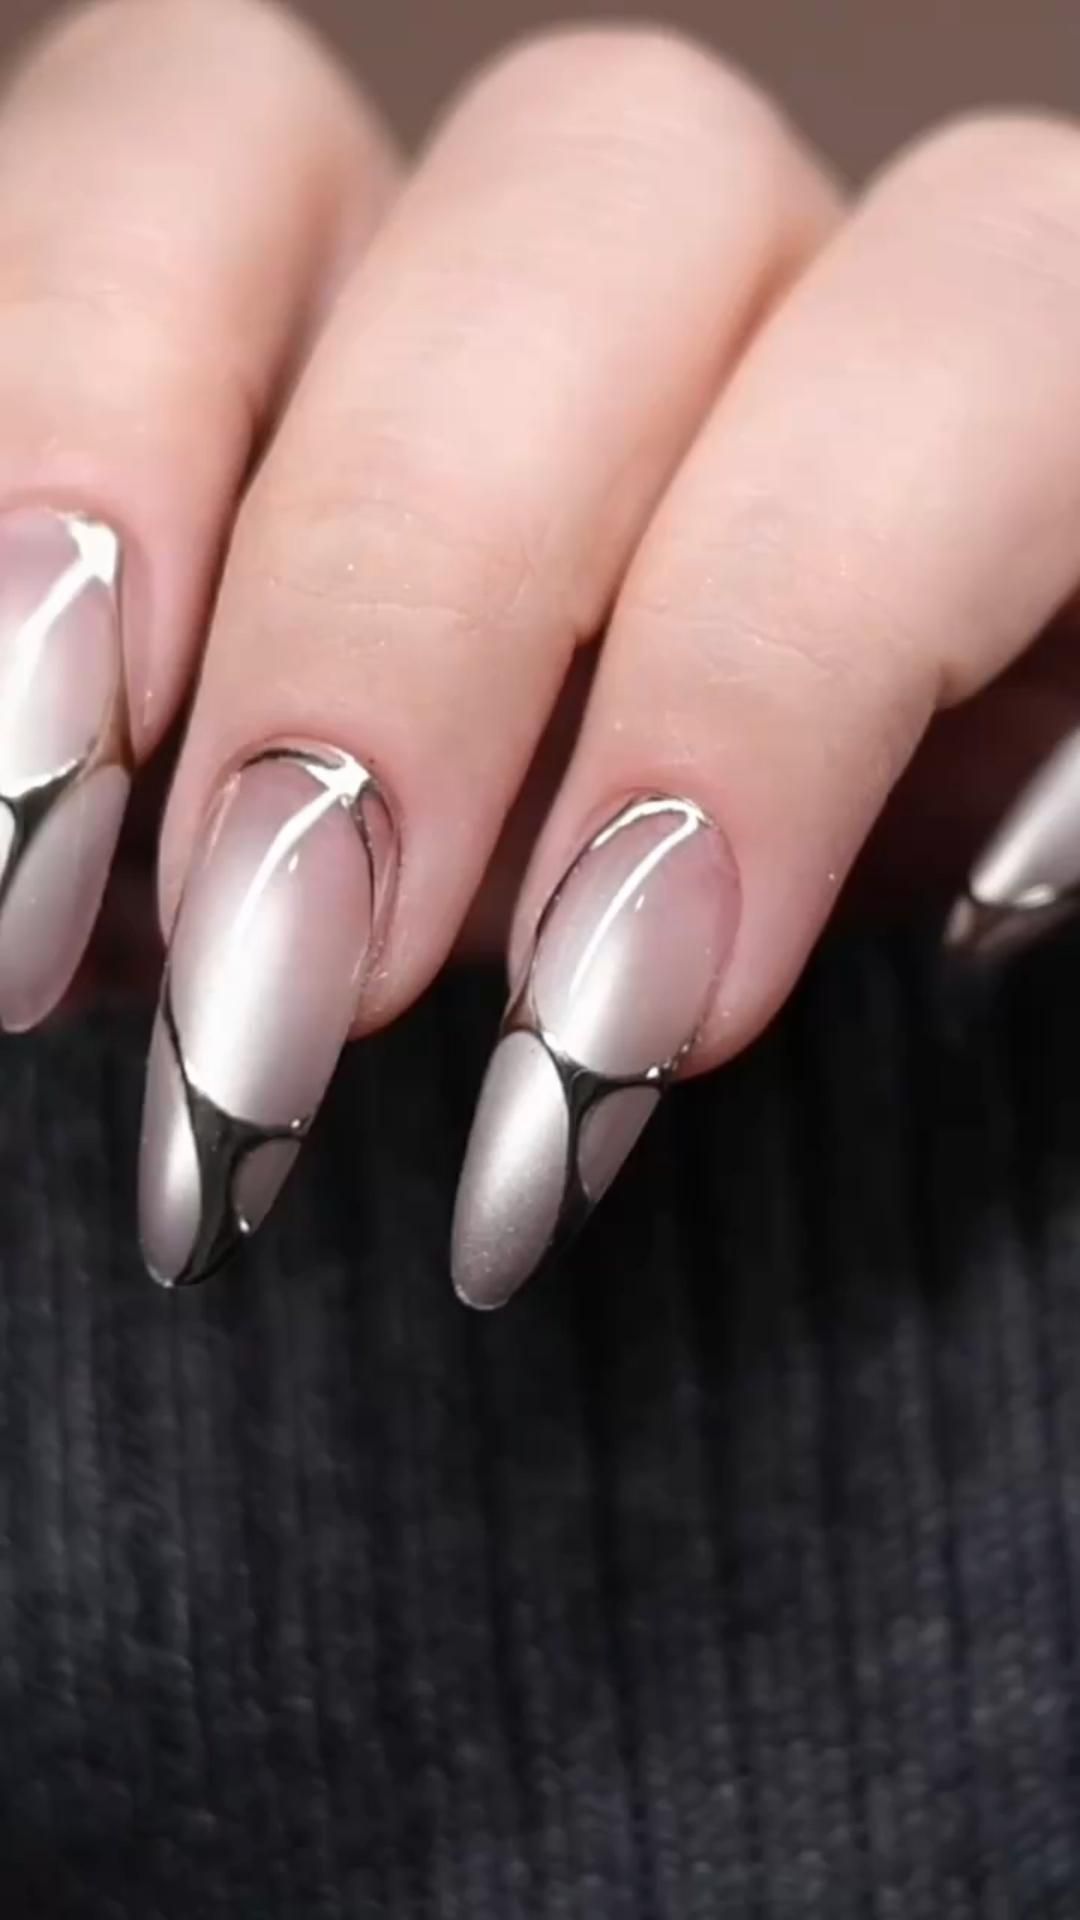
Achieve a modern and sleek look with geometric jelly nails! This design plays with shapes and lines to create a polished and artistic vibe. It’s a fabulous choice for professional settings or any occasion where you want to appear sophisticated.
Begin with a neutral jelly base like soft beige or pale pink. Use nail tape to create various shapes on your nails. After applying the tape, paint over it with contrasting jelly colors, then remove the tape for a trendy geometric masterpiece.
Outfit Pieces:
– Soft beige jelly polish
– Pale pink jelly polish
– Contrasting jelly colors (like navy or black)
Styling Tips:
– Ensure your base color is fully dry before applying the tape for crisp lines.
– Cut tape into clean shapes using sharp scissors for precise designs.
– Mix different shapes and colors for an eclectic, eye-catching result.
This chic style is great for work or any event where you want to impress!
Image credit: Belleza Tottal on Pinterest
You might also like
10 Best Nail Care Kits for At-Home Manicures – Salon Quality at Home
10 Stunning Cool Blue Aesthetic Rooms That Will Refresh Your Space Instantly!
6. Floral Fantasy
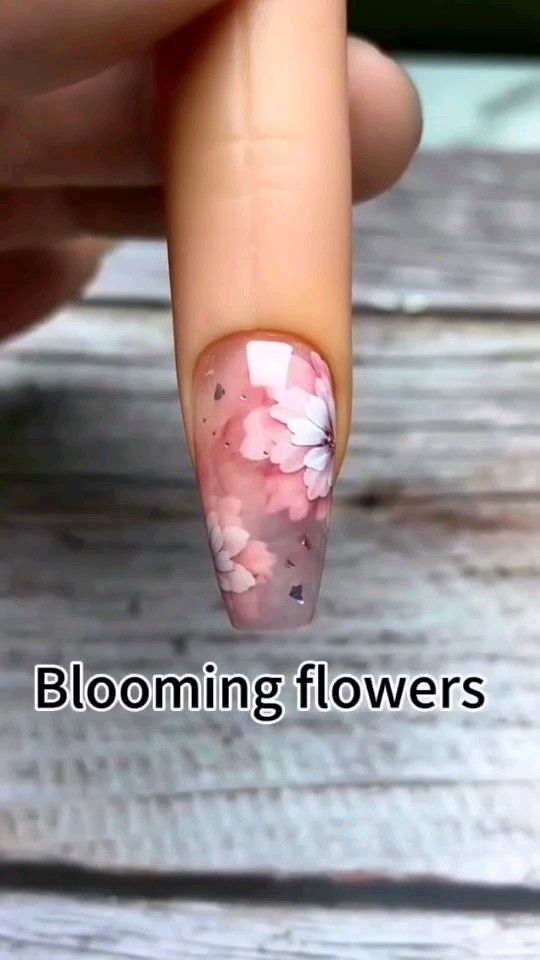
Infuse your nails with the beauty of spring through a floral jelly design! This elegant look captures the essence of blooming gardens with a range of jelly colors. Ideal for weddings, garden parties, or any occasion calling for a feminine touch.
Start with a light jelly base, like soft lavender or pale pink. With a thin brush, paint delicate flowers in multiple jelly shades, layering colors for depth. Tiny dots can serve as flower centers, adding detail. Finish with a glossy topcoat to seal in those garden vibes.
Outfit Pieces:
– Light lavender jelly polish
– Pale pink jelly polish
– Additional jelly colors for flowers (like white or yellow)
Styling Tips:
– Opt for light pastel shades for a soft and dreamy spring look.
– Add tiny green leaves for an extra touch of nature.
– Keep your nails short to medium length for the best effect.
This design is perfect for brightening up your spring outfits and adding a touch of romance!
Image credit: Nail & Nail on Pinterest
7. Neon Glow
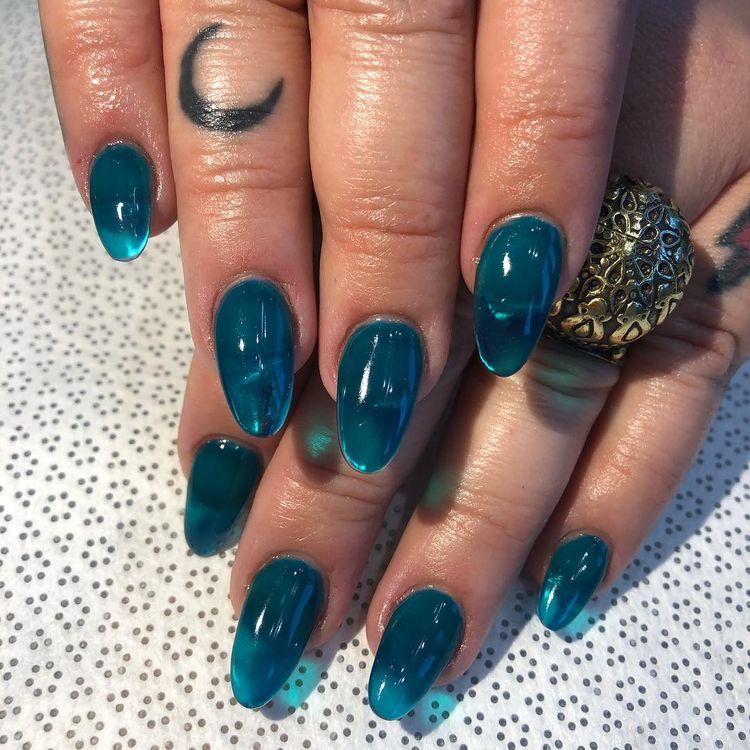
If you love to make a statement, neon jelly nails are the perfect choice! Bursting with bright colors, this electrifying design will elevate any outfit and showcase your vibrant personality. It’s ideal for parties, concerts, or any time you feel bold.
Start with a base coat of your favorite neon jelly color. Layer a second neon shade using a sponge for a trendy gradient. For added flair, consider nail stickers or gems. Seal everything with a high-gloss topcoat to amplify the brightness.
Outfit Pieces:
– Neon pink jelly polish
– Neon green jelly polish
– Neon orange jelly polish
– Optional: nail stickers or gems for extra sparkle
Styling Tips:
– Mix and match neon colors for a fun, eclectic design.
– Consider a matte finish for a softer take on bright shades.
– This bold design is perfect for when you want to turn heads!
Embrace your inner wild child with these vibrant nails!
Image credit: ꩜ on Pinterest
8. Minimalist Vibes
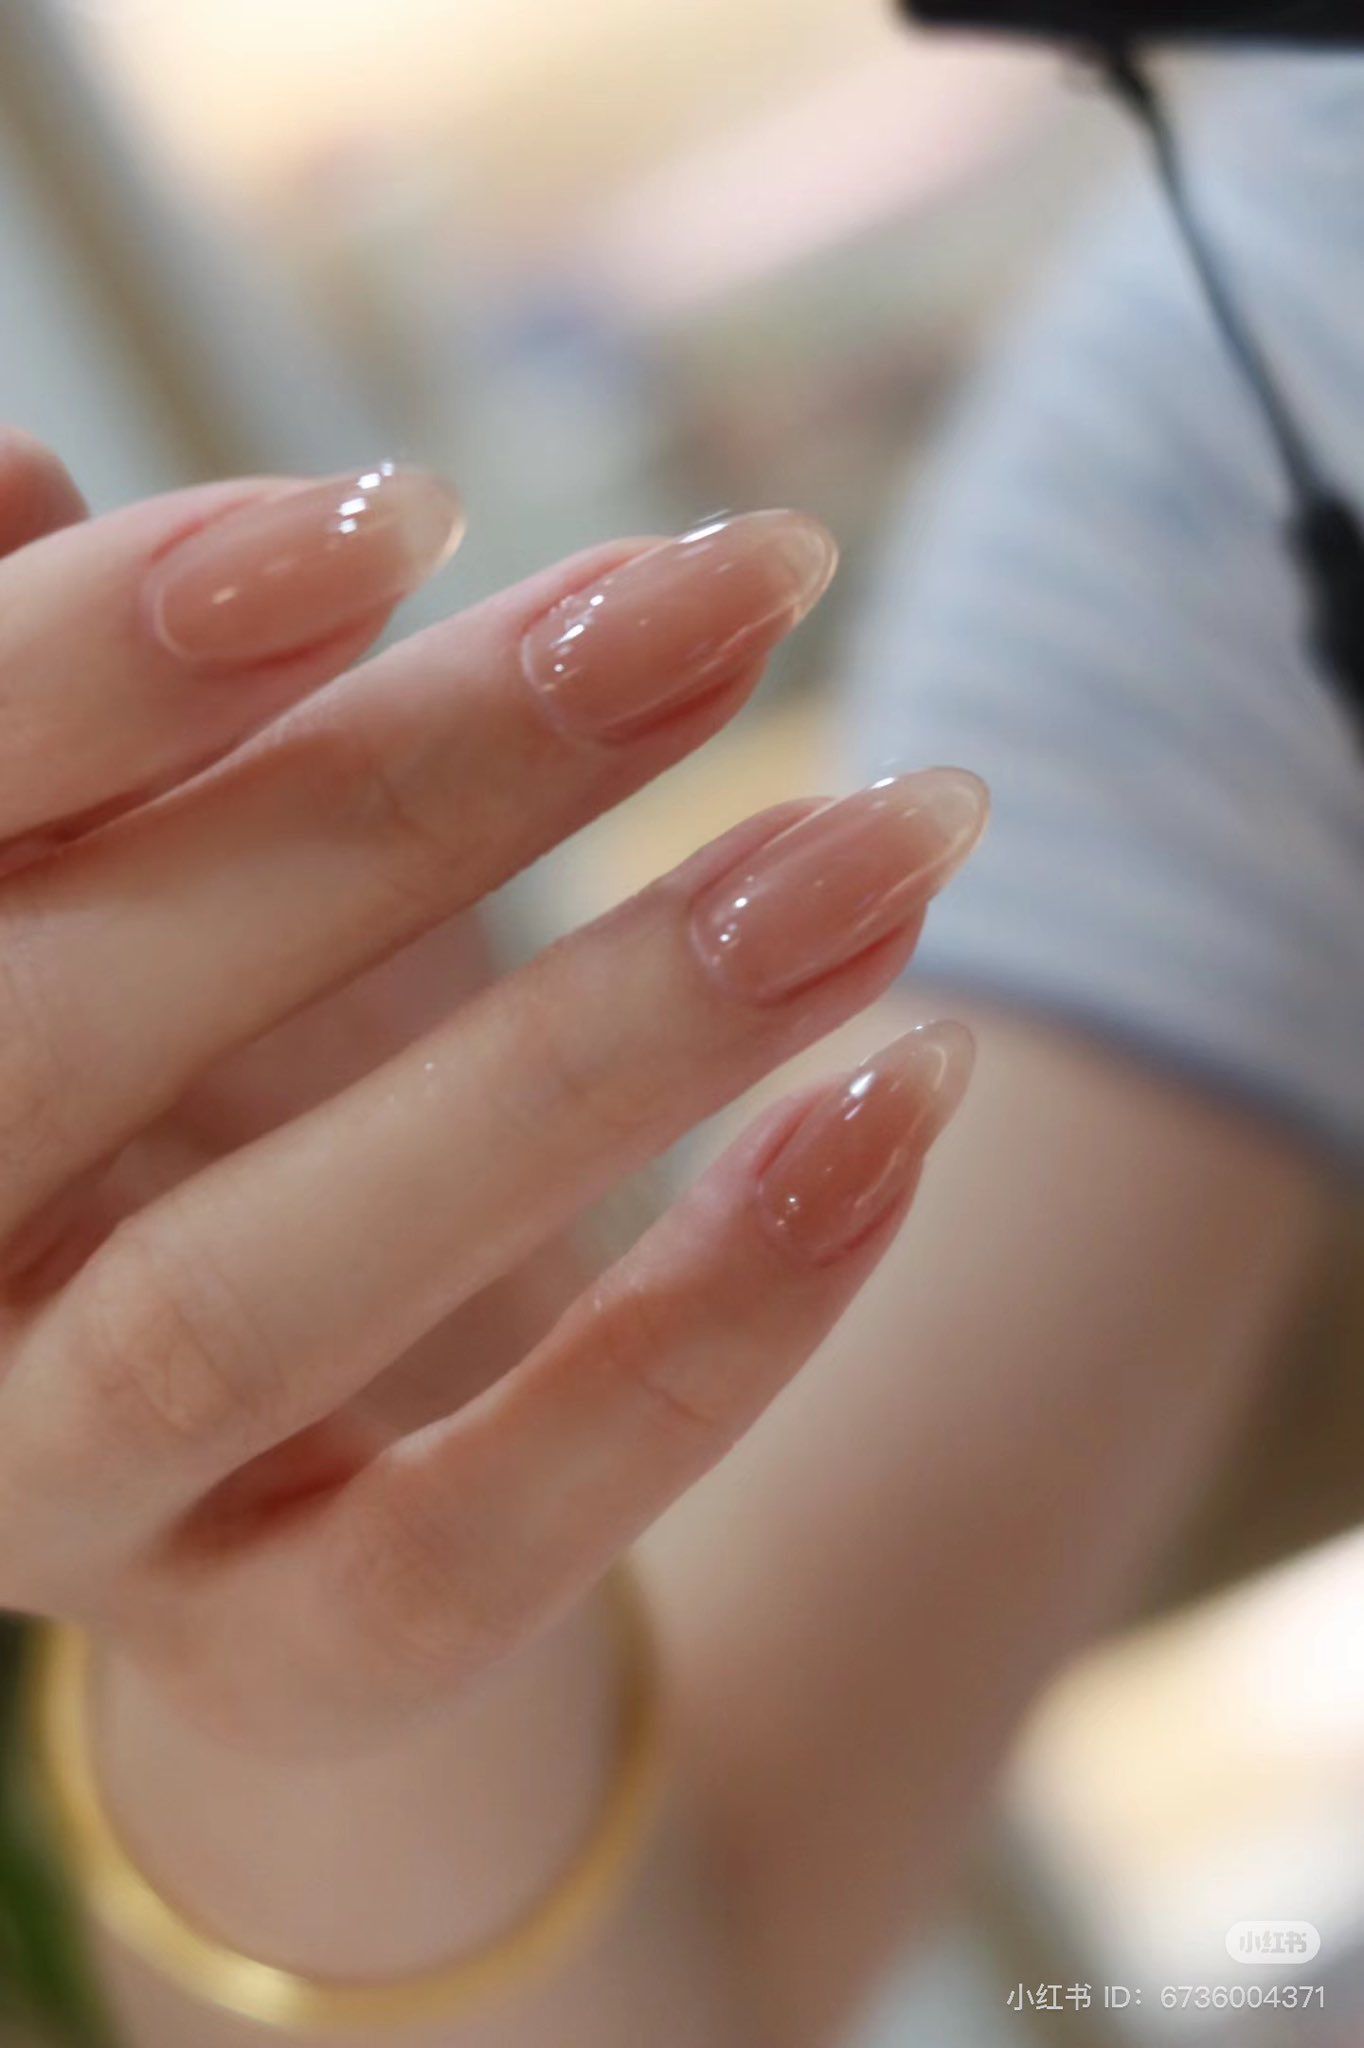
Less is often more, and minimalist jelly nails embody this perfectly! This chic design emphasizes clean lines and simple colors, making it a versatile choice for any occasion, from the office to a night out.
Select a soft or neutral jelly base and use a fine brush to create simple lines or dots in contrasting jelly shades. Stick to a monochromatic palette or soft pastels for a sophisticated finish. A glossy topcoat will enhance the sleek look.
Outfit Pieces:
– Soft beige jelly polish
– Light gray jelly polish
– White jelly polish for accents
Styling Tips:
– Keep designs minimal; one or two colors work best for this look.
– Focus on precision for a clean and polished appearance.
– Pair these nails with tailored outfits for an elegant touch.
Minimalist nails are trendy and perfect for those who appreciate understated beauty!
Image credit: S🐶 on Pinterest
Minimalist Vibes
Editor’s Choice
You Might Also Like
10 Stunning Purple Blush Looks You Need to Try Right Now (Get Ready to Turn Heads!)
10 Polka Dot Outfits That Will Have You Turning Heads (Style Tip #3 Is a Must-See!)
9. Animal Instincts
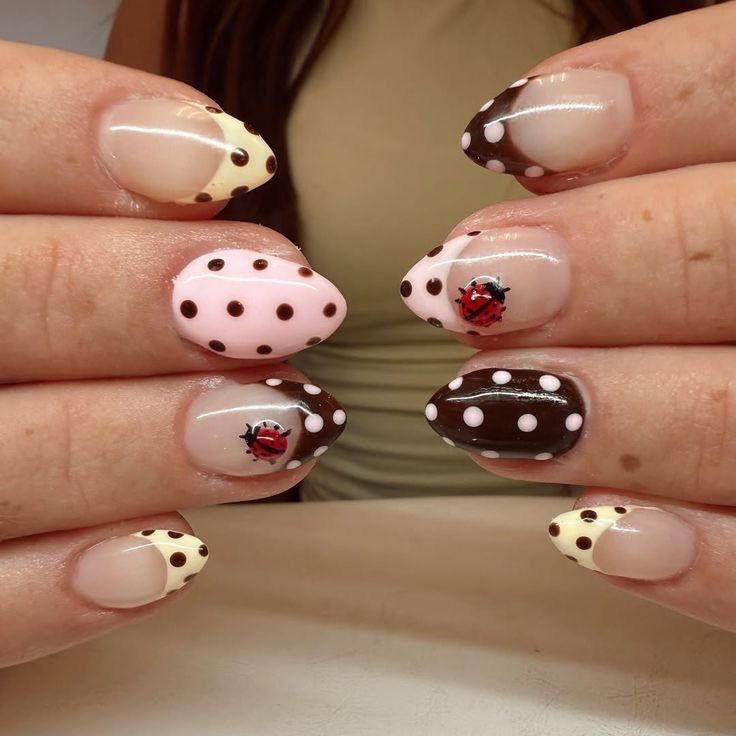
Show your wild side with animal print jelly nails! Whether you prefer leopard spots or zebra stripes, this design adds a fun and fierce element to any look. It’s a great way to express your personality and creativity.
Start with a jelly base color of your choice, like a soft tan for leopard spots. Use a small brush to create animal patterns with contrasting jelly colors, such as black or brown. Finish with a high-gloss topcoat for that extra shine.
Outfit Pieces:
– Soft tan jelly polish
– Black jelly polish for spots or stripes
– Brown jelly polish for accents
Styling Tips:
– Try different animal patterns to keep your nails fresh and fun.
– Opt for muted base colors to let the prints stand out.
– This playful style transitions easily from day to night!
This design is perfect for those who love to make a statement with their nails!
Image credit: bea on Pinterest
10. Sparkling Sensation
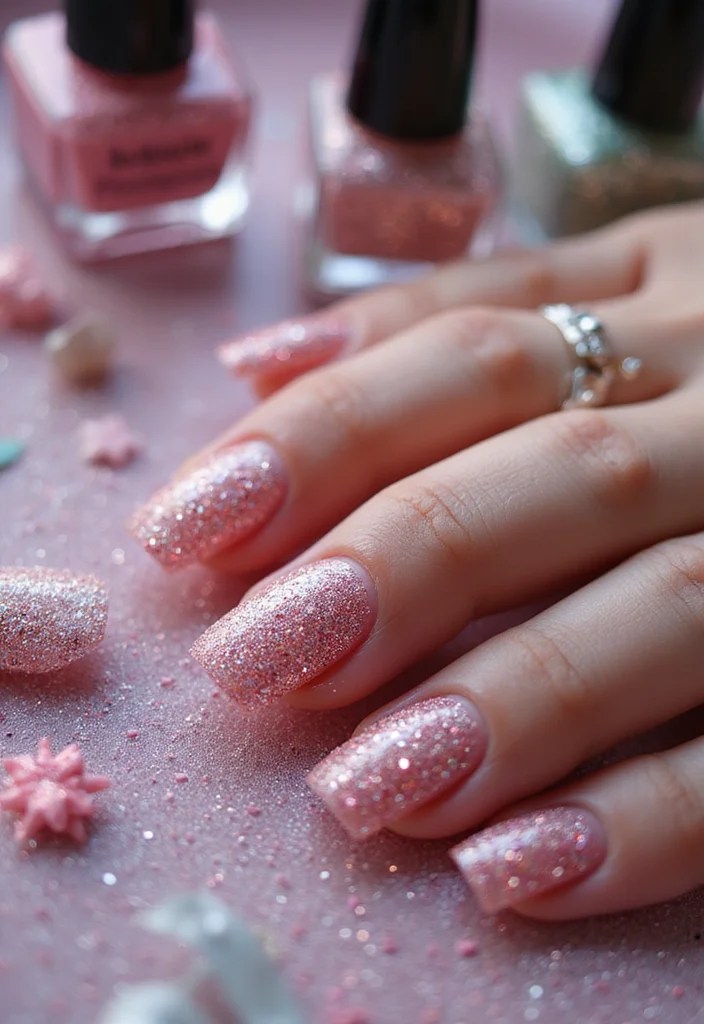
Add a touch of dazzlement to your nails with a sparkling jelly design! This look combines the translucent quality of jelly with the glam of glitter, creating a captivating effect. Perfect for celebrations or special occasions, your nails will truly shine.
Begin with a jelly base color of your choice. Once it’s dry, apply a layer of fine glitter, focusing on the tips for a gradient effect or covering the entire nail for full sparkle. Complete the look with a glossy topcoat for a sleek finish.
Outfit Pieces:
– Your favorite jelly base color (like soft pink or clear)
– Fine glitter in a matching color
Styling Tips:
– Choose glitter shades that complement your base for a cohesive look.
– Mix different glitter sizes for added texture and depth.
– This design is perfect for any festive event or when you want to feel special!
Let your nails sparkle and shine like the stars with this eye-catching design!
Did you know jelly nails sparkle up to 30% more when you layer fine glitter? A quick tip: start with a jelly base, dab glitter on tips for a gradient, then seal with a glossy topcoat to keep the shine blazing.
Image credit: estermeadow on Pinterest
Conclusion
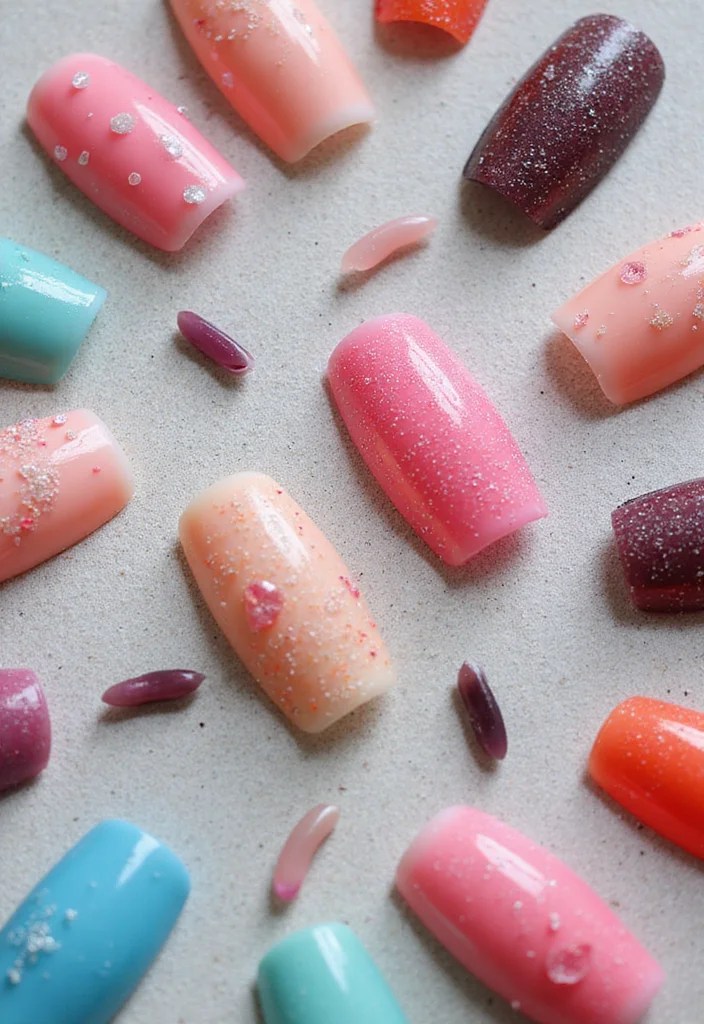
Jelly nails are not just a trend; they’re a vibrant expression of individuality and creativity. With so many stunning designs to choose from, there’s a jelly nail look for everyone!
Experimenting with colors, patterns, and finishes can lead to endless possibilities, whether you’re going for playful fruit designs or elegant minimalist vibes. Don’t be afraid to try out multiple styles and find what resonates with you. Happy nail painting!
Note: We aim to provide accurate product links, but some may occasionally expire or become unavailable. If this happens, please search directly on Amazon for the product or a suitable alternative.
This post contains Amazon affiliate links, meaning we may earn a small commission if you purchase through our links, at no extra cost to you.
Frequently Asked Questions
What exactly are Jelly Nails and how do they differ from traditional nail polish or gel nails?
Jelly Nails are a translucent, glossy gel manicure that looks like color melted over the nail. They’re buildable, vibrant, and create colorful nails with depth and a glassy finish. They differ from opaque polish by layering sheer jelly shades for a soft, dimensional look, and from standard gel by staying semi-sheer rather than fully opaque. To get them at home, prep nails, apply a sheer jelly base in thin layers, cure between layers if you’re using gel, then seal with a top coat. In the salon, ask for a jelly overlay with a sheer tint to achieve that plump, glassy effect. Maintenance is simple: keep cuticles hydrated and avoid harsh acetone to maximize wear, typically 2–3 weeks.
What jelly nail designs are trending this season?
This season is all about sheer color with bold accents. Popular Jelly Nail designs include jelly ombré, where two or more jelly shades fade into each other; jelly French tips with tinted tips; multi-nail color blocks in different jelly shades for a playful vibe; translucent glitter or foil accents layered over a jelly base; and fruit-inspired or pastel tones for a soft, candy-like look. For DIY recreations, bring a photo or ask for a gradient of two shades and specify a glossy finish. When booking, mention nail trends and colorful nails to get help picking shades that flatter your skin tone and season.
How can I achieve Jelly Nails at home safely and easily?
Start with a clean, dry canvas: push back cuticles, gently buff the nail, and choose a sheer jelly shade. Apply a thin layer of clear base gel and cure. Build your color with 2–3 ultra-thin jelly layers, curing between each layer for a smooth, glassy finish. Finish with a high-gloss top coat and cure again. For best results, practice on one nail first or use a jelly gel kit designed for at‑home use. Pro tip: keep nails moisturized and avoid over-filing to prevent lifting.
How long do Jelly Nails last and how should I care for them to maximize wear?
With proper application and care, Jelly Nails typically last about 2–3 weeks, sometimes longer if you’re gentle with your hands. Protect the finish by wearing gloves when cleaning, avoiding harsh chemicals, and reapplying a thin top coat every 5–7 days if not using a gel top coat. Keep nails hydrated with cuticle oil and use a gentle nail cleanser to prevent buildup. When you notice chipping or growth gaps, book a quick maintenance fill rather than peeling it off to avoid damage.
Are Jelly Nails safe for natural nails and how do I remove them safely?
Jelly Nails can be gentle on natural nails when applied and removed correctly. Give your nails a break between treatments to avoid thinning. Removal is best done by soaking the tips in acetone until the jelly softens, then gently pushing off with a wooden stick or using foil wraps with gel remover; never pry or peel. After removal, cleanse, moisturize, and consider a strengthening base coat to restore resilience. If you’re unsure, visit a pro to remove safely and minimize damage.
Related Topics
jelly nails
nail art
colorful nails
nail trends
summer style
easy designs
beginner friendly
trendy nail designs
fashion nails
manicure ideas
seasonal nails
creative nail art


Leave a Reply