
Goddess braids are all the rage! These stunning, chunky braids not only elevate your look but also protect your natural hair. They’re perfect for any occasion, whether you’re heading to a festival or just want to spice up your everyday style.
What’s even better? You don’t need to be a pro to master them! With just a few simple steps and some creative flair, you can transform your hair into a beautiful goddess braid masterpiece in mere minutes.
Let’s explore seven easy tutorials that will have you braiding like a goddess in no time!
Contents
- 1. Classic Goddess Braids
- 2. Half-Up Goddess Braids
- 3. Jumbo Goddess Braids
- 4. Goddess Braids with Twists
- 5. Side Goddess Braids
- 6. Goddess Braids with Beads
- 7. Braided Updo with Goddess Braids
1. Classic Goddess Braids
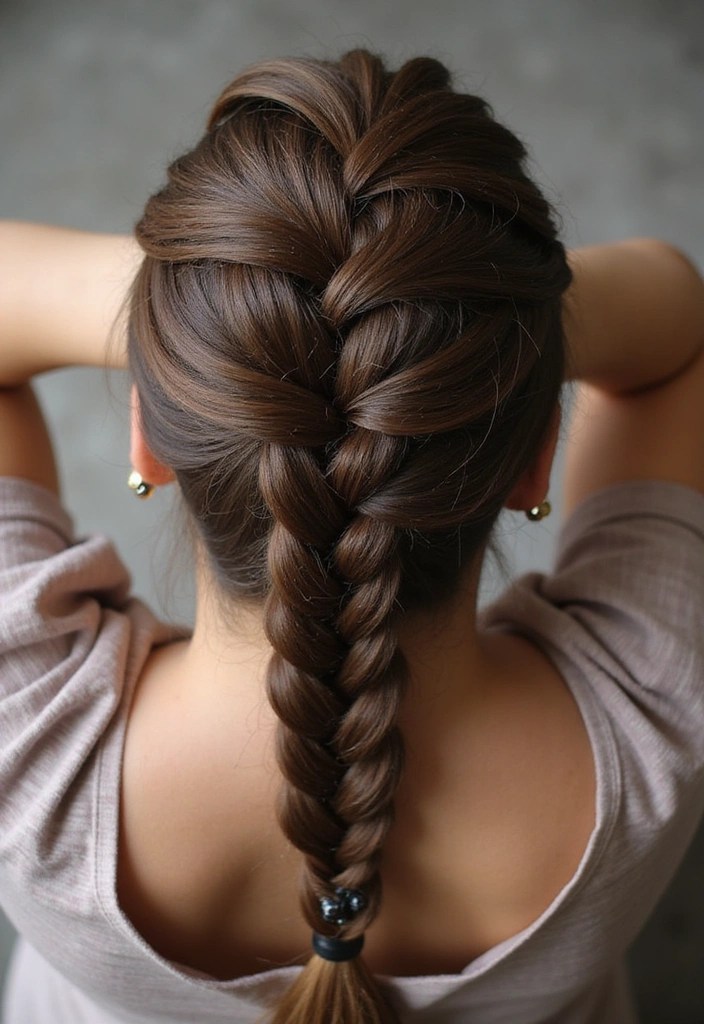
The classic goddess braid is always a winner. This timeless style features large, chunky braids that lie flat against the scalp, creating a chic and elegant look. Perfect for any occasion, it’s simple yet stunning!
To start, section your hair into large parts. Before you begin, use a good detangler like Marc Anthony Leave-in Conditioner Spray & Detangler to ensure your hair is smooth and manageable. This will help prevent breakage and make the braiding process much easier.
Begin braiding each section like a regular braid but leave the ends loose for a relaxed vibe. Secure each braid with a small elastic, and consider adding some flair with accessories. A great option is the YANRONG Multicolor Hair Accessories Set, which includes beads and cuffs perfect for personalizing your look.
To keep your edges looking sharp, apply some Mielle Organics Rosemary & Mint Edge Control Gel. This gel provides a strong hold while smoothing flyaways, ensuring your braids look polished and sophisticated.
Remember to experiment with different partings for a unique look, and don’t be afraid to mix in some colored extensions for a fun twist!
2. Half-Up Goddess Braids
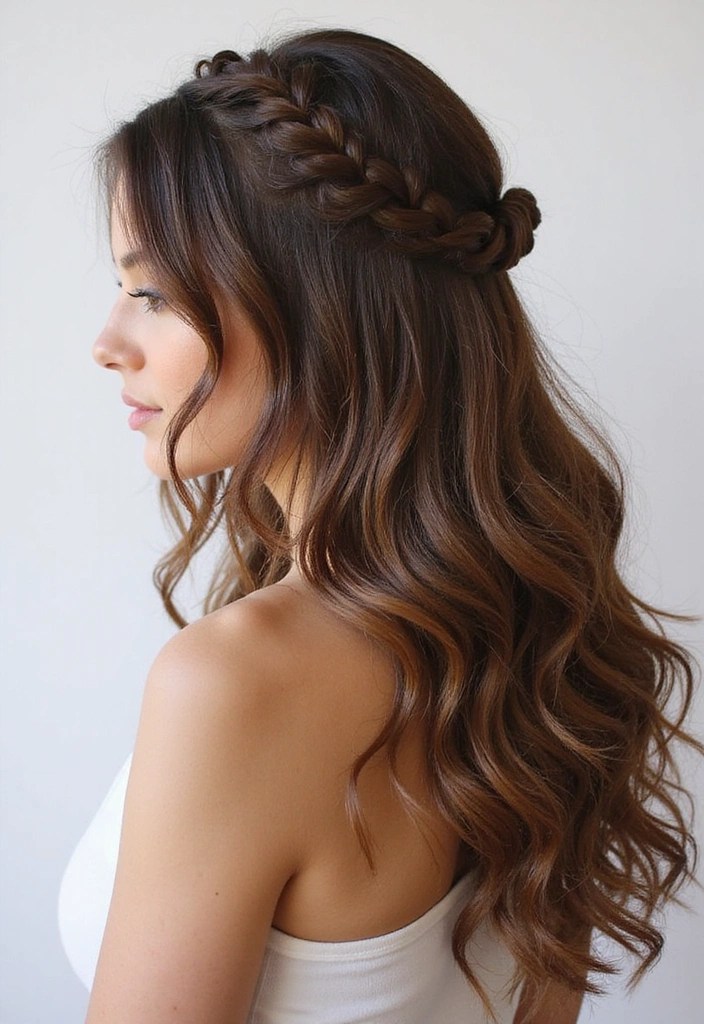
If you’re looking for a playful yet stylish option, the half-up goddess braids are perfect. This look combines the best of both worlds, letting you show off your natural waves while adding braids on top.
Begin by sectioning off the top half of your hair. Braid a couple of sections from the front, pulling them back as you go. Secure the braids with hair elastic bands, and let the rest of your hair flow freely. This effortless style is not only easy to do but also looks fabulous on everyone.
To achieve different effects, play with the size of the braids and sections. If you want a romantic touch, consider adding some curls to the loose hair using a curling wand to create flawless waves. Plus, apply hair pomade to keep your edges smooth and polished, ensuring your look stays neat and stylish all day.
3. Jumbo Goddess Braids
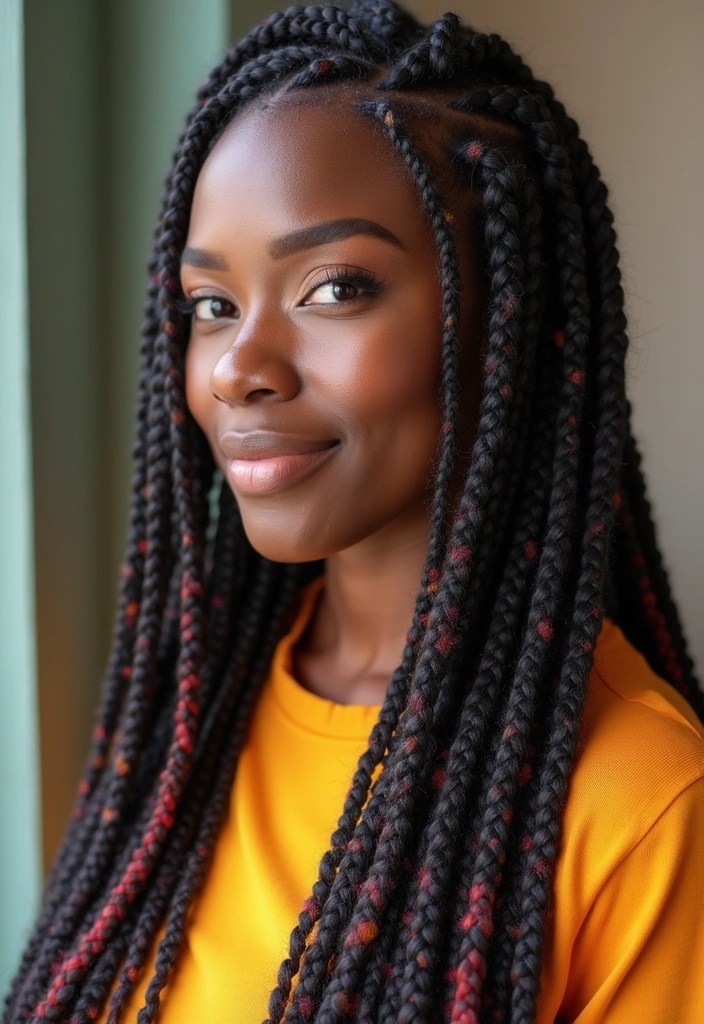
For those who love to make a statement, jumbo goddess braids are the way to go! They are bold, beautiful, and can be done in no time. Perfect for festivals or nights out, these braids will turn heads wherever you go.
To achieve this look, gather sections of hair that are wider than usual and braid them down to the ends. The key to this look is making each braid chunky, so don’t be afraid to grab larger sections. Secure with a strong elastic. You can even intertwine colored hair strands or ribbons for an exciting pop of color.
To keep your hair looking its best, consider using a moisturizing hair cream. Keeping your hair well-moisturized will help you achieve a sleek finish, making the jumbo braids look polished and vibrant.
A wide-tooth comb is essential for detangling your hair before you start braiding. It helps to avoid breakage, ensuring your hair remains healthy and strong.
If you’re looking to add extra volume and length to your jumbo goddess braids, consider incorporating hair extensions (chunky braids). These extensions can give your braids that dramatic flair you desire, making them even more eye-catching.
With these tips and products, you’ll be ready to rock those gorgeous jumbo goddess braids in no time!
4. Goddess Braids with Twists
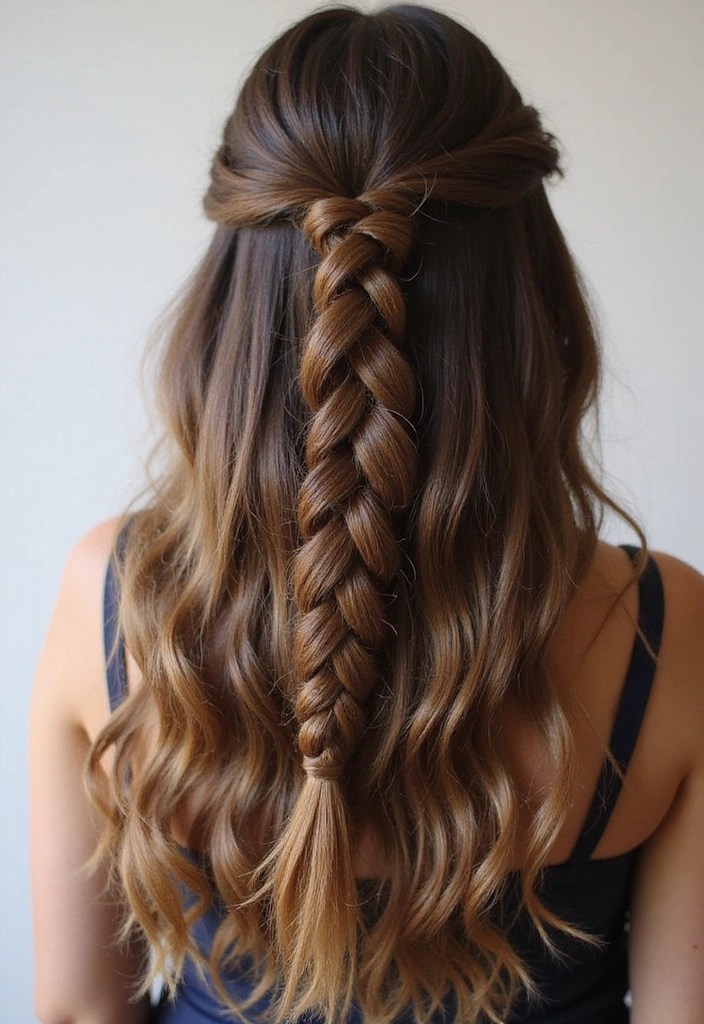
Twists are a fantastic way to add dimension to your goddess braids, providing a unique flair that makes your style stand out. This tutorial shows you how to incorporate twists into braiding for a stunning effect.
Start by sectioning your hair as you would for classic braids, but instead of braiding, twist each section. After twisting, combine them into one big braid at the end for a princess-like finish. This style is perfect for transitioning from day to night with minimal effort.
For added texture, consider using Moroccanoil Curl Defining Cream before twisting. This curl cream helps enhance the definition and manageability of your curls, ensuring your twists look polished and well-formed.
To secure your twists for a more defined look, use hair clips. These clips will hold your twists in place while you work, allowing you to maintain a neat and tidy appearance throughout the styling process.
Finally, consider pairing this style with a decorative headband for a sweet touch. A beaded or sparkly headband can elevate your look, adding a bit of glam to your goddess braids and making them suitable for any occasion.
5. Side Goddess Braids
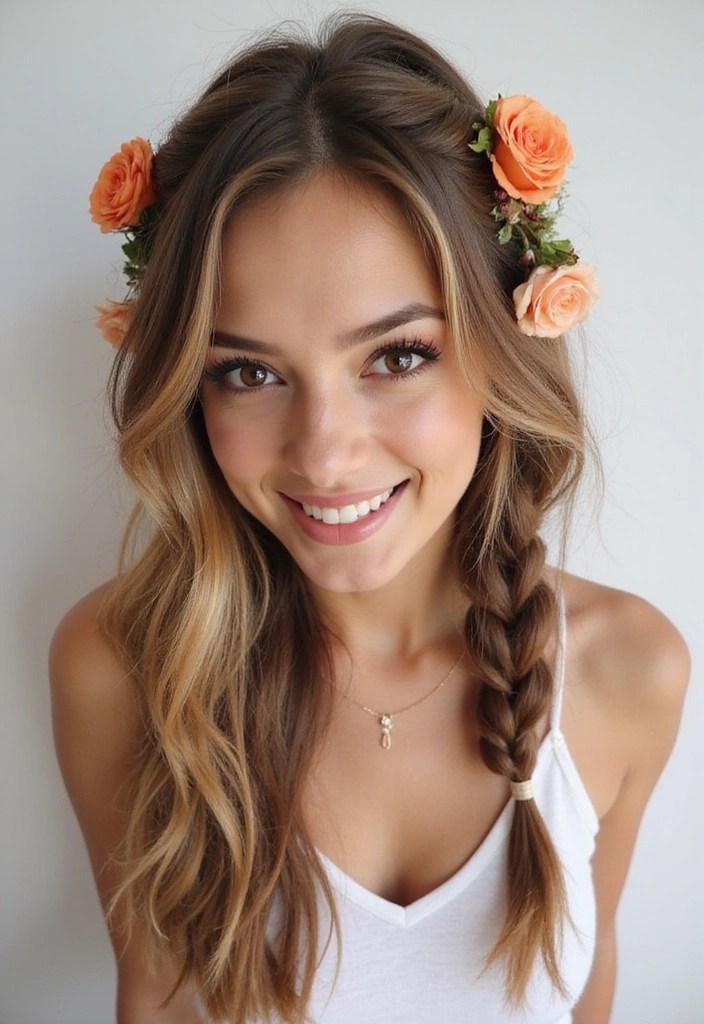
Side goddess braids offer a fun and flirty vibe that’s perfect for summer outings or casual dates. This asymmetric style allows you to show off your braids while keeping things relaxed.
Start by parting your hair to one side and braid all the hair to the opposite side. You can create one large braid or multiple smaller ones depending on your preference. To secure your braids, finish with some cute hair ties like the cute hair ties, which are designed to hold your hairstyle without causing damage. This style is not only simple but also allows you to flaunt your hair’s natural beauty.
For an extra touch, consider leaving some fringe out to frame your face. A lightweight styling cream such as Moroccanoil Hydrating Styling Cream can help keep your style in place without stiffness, ensuring you maintain that effortless look.
If you’re looking to add a bohemian twist, adorn your braids with some floral hair accessories. Adding a few flowers or greenery will elevate your hairstyle and make it perfect for any summer occasion.
6. Goddess Braids with Beads
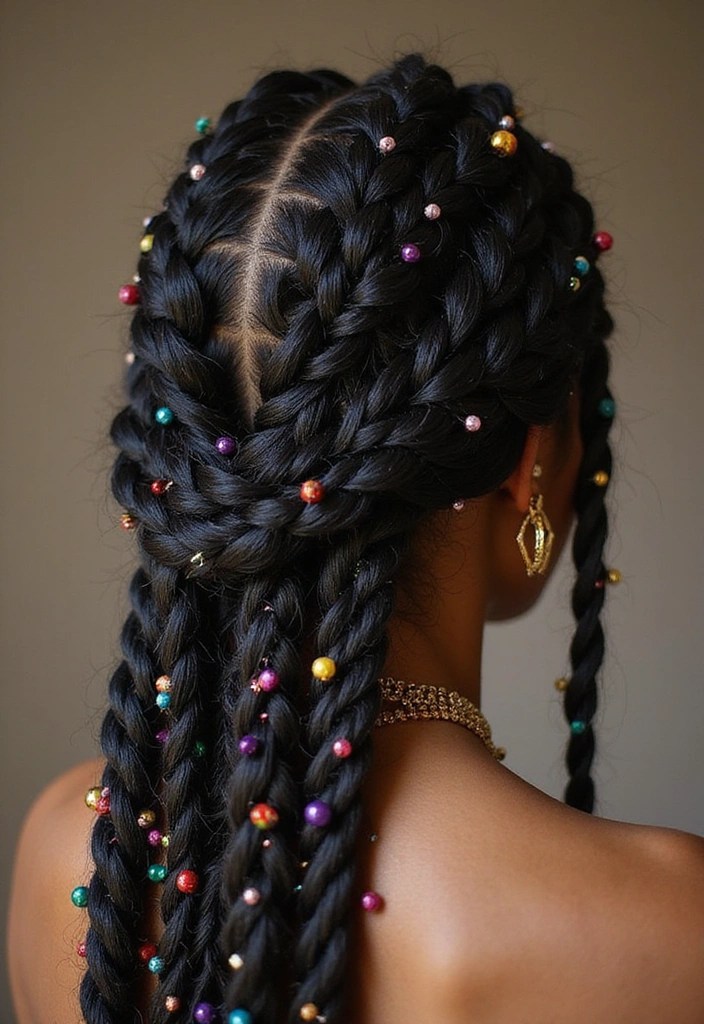
Goddess braids adorned with beads can elevate your look from basic to fabulous. This style is incredibly versatile and allows for personalization, as you can choose different colors and styles of beads to express your unique flair.
To incorporate beads, simply add them onto finished braids before securing them with a rubber band. For easier threading, consider using a bead hair accessories kit to load your beads efficiently. This handy tool makes the process quick and seamless, ensuring that your braids are eye-catching and distinct.
Make sure your hair is damp when adding beads for easy threading. A spritz of damp hair spray can help you achieve the perfect moisture level for this step. It not only prepares your hair for styling but also helps in maintaining the look throughout the day.
Finally, remember to secure the ends of your braids with hair rubber bands to prevent bead loss. Using different sizes of beads can add a fun, eclectic touch to your goddess braids, making them truly your own. Enjoy creating this stunning hairstyle!
7. Braided Updo with Goddess Braids
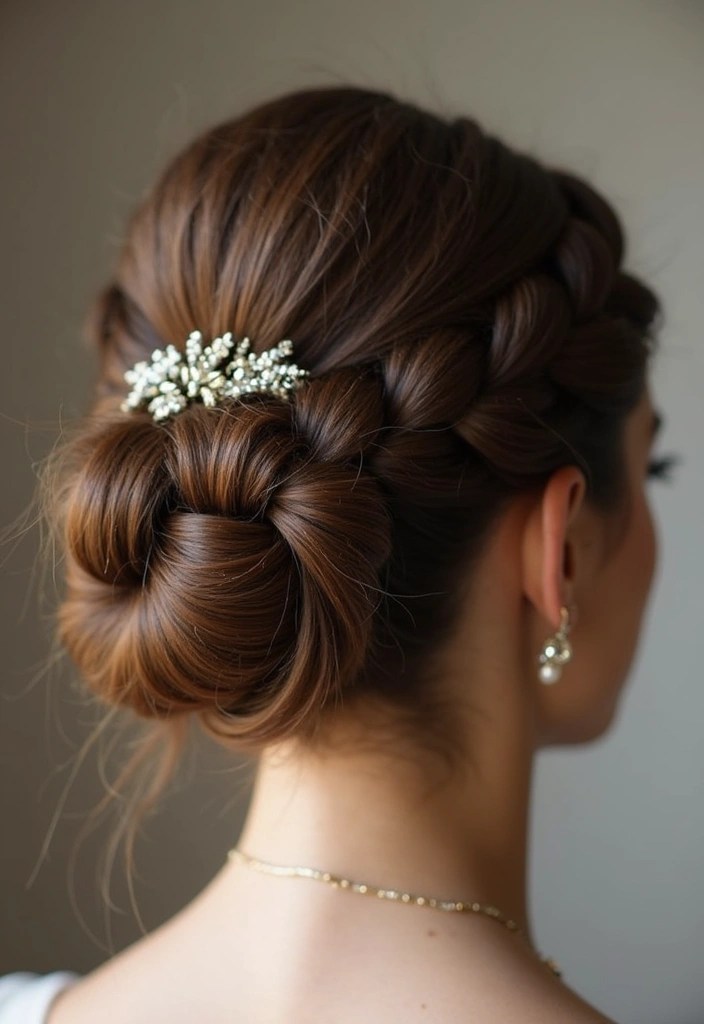
For an elegant evening look, a braided updo using goddess braids can be the perfect choice. This style offers sophistication while still being simple to create.
Start by creating a few goddess braids and then gather them into a bun or a chignon. Allow some tendrils to frame your face for a soft look. This updo is excellent for weddings or any formal occasion where you want to shine.
To keep everything secure, use hair pins like the Teenitor 300pcs Bobby Pins Kit, which includes a variety of styles to ensure your braids stay in place throughout the event. To add a lasting finish, spritz a light hold hairspray such as Nexxus Flexible Hold Hairspray. This hairspray provides a brushable hold without making your hair stiff, thanks to its StyleProtect technology.
For an extra touch of glam, consider adding decorative elements like Catery crystal bridal hair combs. These beautiful rhinestone hairpieces can elevate your updo, making it even more special for your occasion.
With these simple products, your braided updo will be not only easy to create, but also stunningly sophisticated.
Conclusion

Goddess braids are not just a hairstyle; they’re a form of self-expression! With these seven easy tutorials, you can unlock your inner goddess and experiment with different looks. Whether you prefer classic styles or want to add a modern twist, there’s a braid for every occasion.
So grab your hair products and get ready to braid your way to beauty!
Note: We aim to provide accurate product links, but some may occasionally expire or become unavailable. If this happens, please search directly on Amazon for the product or a suitable alternative.
This post contains Amazon affiliate links, meaning I may earn a small commission if you purchase through my links, at no extra cost to you.

Leave a comment